|
Branding season has begun in our part of the woods! So I thought I would share some of our favorite recipes that we used this year. I typically make the majority of our branding recipes during the winter months when we are calving, and freeze them, because nobody wants to waste time in a kitchen when the sun is shining I the summer!
Because our new place isn't finished (or even close!) my in-laws have so graciously allowed us to use their facilities to calve, and share their branding. Our herd is still growing so it works out just great to be able to pair with them to get all of our calves branded at once. And I think our neighbors and friends enjoy it, because although brandings are super fun, after the 10th or 11th one, you just want your weekends and evenings back! What's on our menu
This is the ladies' job. When it comes to branding supper my hubs thinks we need to spend a fortune, have 5 courses and serve only desserts that need to be individually served with ice cream- YEAH RIGHT!!! So my mother-in-law and I sat down to hash out the details. We expect about 45 people at our branding (mostly family members) so we need things to be affordable, delicious and most of all, EASY!
I have linked some of the recipes we used this year, but here is our full menu: Crockpot Cabbage Rolls
|
|
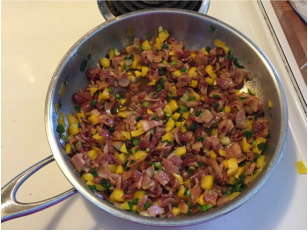
1- 1.5 lbs of bacon
3/4 of a pepper (red, yellow or orange), cut into small pieces 2 tsp dry mustard 1/2 cup to 3/4 cup of brown sugar (depending on taste) 1 tsp paprika pepper to taste 2 LARGE (2L each or 4 each of the regular sized cans) cans of tomato sauce or maple flavoured beans (NOT molasses flavoured or kidney beans) |
|
Directions
1. Fry the bacon in a frying pan until it become soft (not crispy). Remove. Once cooled, cut into small pieces.
2. In a large pot or pan, combine bacon, peppers, dry mustard, sugar, paprika and pepper. Let simmer to combine the ingredients. Taste the mixture. At this point it should have a bit of a bite to it. Adjust ingredients as necessary for your preference. You may want to add more paprika.
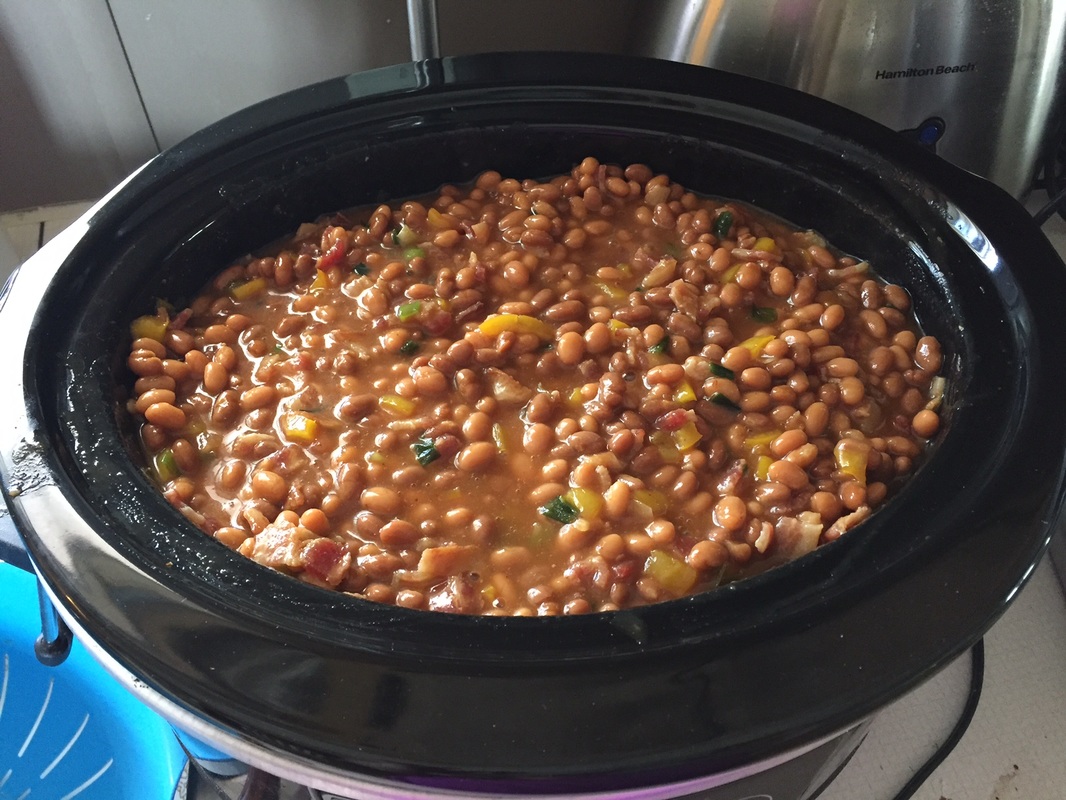
3. Add the beans to the pot or combine all ingredients in a slow cooker. Let cook until all ingredients are hot.
4. Serve!
I usually cook bacon a couple days ahead of time, chop it up and throw it in the fridge. On branding morning I quickly simmer the bacon, peppers, onions and spices. I then throw that in the crockpot with the beans and leave it on low all day until it's time serve.
I made a single batch for 45 people at our branding. There wasn't a lick left! I would suggest making a double batch for over 35-40 people. It will keep in the fridge or can be frozen to eat later.
2. In a large pot or pan, combine bacon, peppers, dry mustard, sugar, paprika and pepper. Let simmer to combine the ingredients. Taste the mixture. At this point it should have a bit of a bite to it. Adjust ingredients as necessary for your preference. You may want to add more paprika.
3. Add the beans to the pot or combine all ingredients in a slow cooker. Let cook until all ingredients are hot.
4. Serve!
I usually cook bacon a couple days ahead of time, chop it up and throw it in the fridge. On branding morning I quickly simmer the bacon, peppers, onions and spices. I then throw that in the crockpot with the beans and leave it on low all day until it's time serve.
I made a single batch for 45 people at our branding. There wasn't a lick left! I would suggest making a double batch for over 35-40 people. It will keep in the fridge or can be frozen to eat later.
Posted By: Jesse Williams
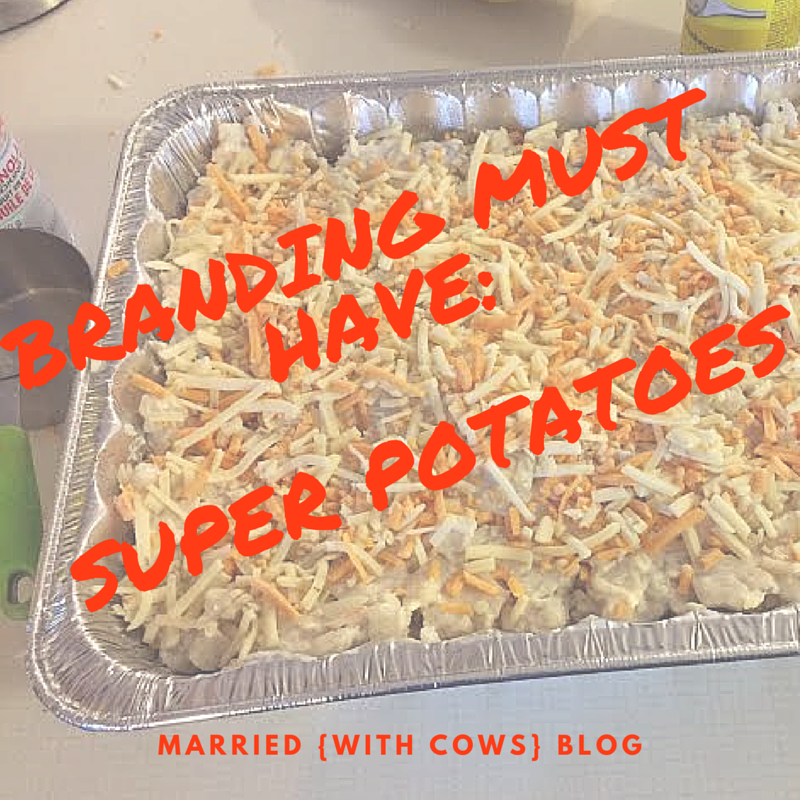
This recipe is my number one recipe for any and all pot lucks, including branding. It is easy to make, especially in big batches, freezable, and always a favorite around the dinner table. I like to make all sizes, ranging from individual to party size, to have on hand in my freezer. They do take some time to thaw so I usually set them out the night before or the morning of to make sure.
Ingredients
2lbs frozen hashbrowns **
1 cup diced onions 2 cans mushroom soup 500mL (large carton) sour cream 1/2 cup margarine 2 + 1 cups shredded cheddar cheese salt & pepper to taste **I tried to use diced potatoes from my garden. It DID NOT work! I think maybe if you fried them first, but that's too much work for this gal. Just cheap out and buy the $2.00 bags! Directions
|
|
Preheat oven to 350F.
Literally just mix this all together in one GIANT bowl. Add 2 cups of cheese into the mixture and save the remaining cup to sprinkle on top.
Grease a large tin pan (because nobody wants to clean pans after branding!) and spread the mixture into the pan. Top with extra cheese. Put a layer of foil on top.
Cook at 350F for about an hour. Test with a fork to make sure it is hot all the way through.
*I triple the recipe to feed about 65 people at branding. I also make extra and freeze in individual tin containers for Clay and I to just pop in the oven when we're feeling lazy!
You may also like...
Posted By: Jesse Williams
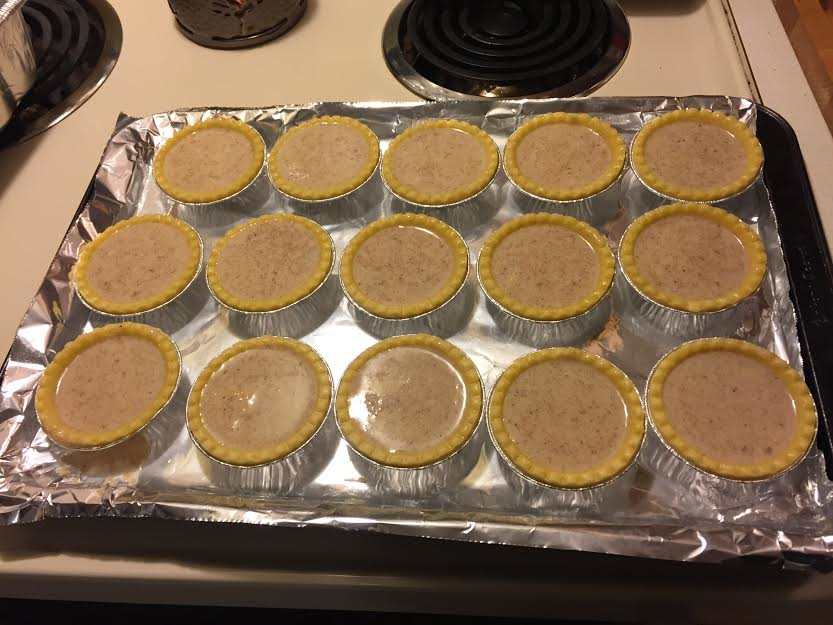
My hubs LOVES pumpkin pies. So when he begged for pie as a dessert at our branding, I knew I had to do something (but certainly not cut and serve 65 slices of pie- is he crazy?!). So I used my all-time favorite easy peasy pumpkin pie filling from scratch recipe and put it into individual tarts. This way all you need to do at branding is put them out with a can of whipped cream and there's no fuss or mess! And bonus, just like the apple tarts, this recipe is CHEAP!
Ingredients
|
24 tart shells (or you can make your own using this recipe)
2 cups pureed pumpkin 1 can (14oz) sweetened condensed milk 2 large eggs 1 tsp vanilla 2/3 cup brown sugar 1/3 cup sour cream 2 tsp cinnamon 1/2 tsp nutmeg 1/2 tsp ginger tsp salt |
|
Directions
|
1. Preheat oven to 350F
2. Combine all ingredients in a large bowl. Mix well. 3. Use a ladle to scoop the mixture (it will be very runny) into each tart. Fill to the top. 4. Bake for about 24 minutes. Check often. You want golden brown crust edges. The middle should no longer jiggle (but a toothpick will not come out clean). 5. Cool and enjoy! Or freeze for use at a later time.
|
|
Posted By: Jesse Williams
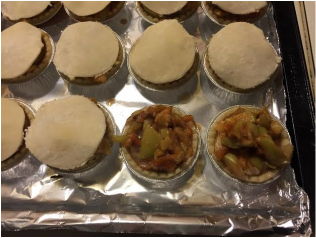
This apple pie filling recipe comes from my mom and it is always a sure-fire hit. You can use the same filling recipe to make one large deep dish apple pie, however for branding I like to make individual tart sized pies for less fuss and easier clean up.
My favorite part about this recipe is how cheap it can be! All the apples are from our trees the year before. I core and cut all our crab apples in the fall, lay them on cookie sheets and freeze them (so they won't stick together). I then throw them in large freezer bags and voila! Pies are too easy!. You can also make all your own pastry (it's actually easy!) for a super cheap way to feed guests.
My favorite part about this recipe is how cheap it can be! All the apples are from our trees the year before. I core and cut all our crab apples in the fall, lay them on cookie sheets and freeze them (so they won't stick together). I then throw them in large freezer bags and voila! Pies are too easy!. You can also make all your own pastry (it's actually easy!) for a super cheap way to feed guests.
Ingredients
-24 tart shells
(plus an extra 24 for the top) or use this recipe to make your own -2 TBSP flour -2 tsp cinnamon -1 cup sugar -6 apples, sliced or 6 cups pre-cut/frozen apples -2 tsp lemon juice -milk, for brushing on tarts |
|
Directions
1. Preheat oven to 350F
2. Thaw frozen tart shells & apples (if necessary)
3. Cut apples, if necessary
4. In a bowl, mix flour, sugar and cinnamon together. Pour the mixture into a bowl with the apples. Mix until all apples are evenly coated.
5. Sprinkle lemon juice on top of apples (I only do this if using really sweet apples. I don't use the lemon juice when I am using crab apples from my backyard.)
6. Fill each pie shell, only to the top.
7. Put upside-down tart shell or pre-cut homemade pie shells on the top of the tart. Squish edges of the tart to keep from boiling over.
8. Brush each tart pie with milk. Slice a hole in the top of each tart.
9. Sprinkle sugar on top of the tarts.
10. Bake in the oven for about 45 minutes. Watch carefully. You want the tart to be golden brown when done.
**I like to put all my tarts on tin foil on top of the baking sheet. Inevitably, some tarts will boil over and it is really difficult to get the baked on goo off!
11. Let cool. Enjoy or freeze for later!
You may also like...

A Blog About Our Life, Love & Lessons Learned on the Ranch
Categories
All
Alberta Beef
#Buildingafarm
Cattle Links
Digital Scrapbook
From The Kitchen
My Badlands
On The Farm
in the media
Archives
February 2024
December 2023
June 2022
February 2022
August 2019
July 2019
July 2018
May 2017
January 2017
November 2016
August 2016
July 2016
May 2016
March 2016
February 2016
January 2016
December 2015
November 2015
August 2015
May 2015
March 2015
November 2014
June 2014
April 2014
February 2014
December 2013
October 2013
September 2013
August 2013
July 2013
