Whiskey Creek Ranch
  • Home
  • Cattle
    • Whiskey Creek Bred Heifers & Cows
    • Whiskey Creek Replacement Heifers
    • Land Stewardship
  • Labrador Retrievers
    • Our Females
    • Available Litters
    • Purchase Information
    • Health & Nutrition
  • Meet the Ranchers
  • Married {with Cows} BLOG
  • Contact

Small Living: Little House on the Prairie

11/16/2015

0 Comments

 
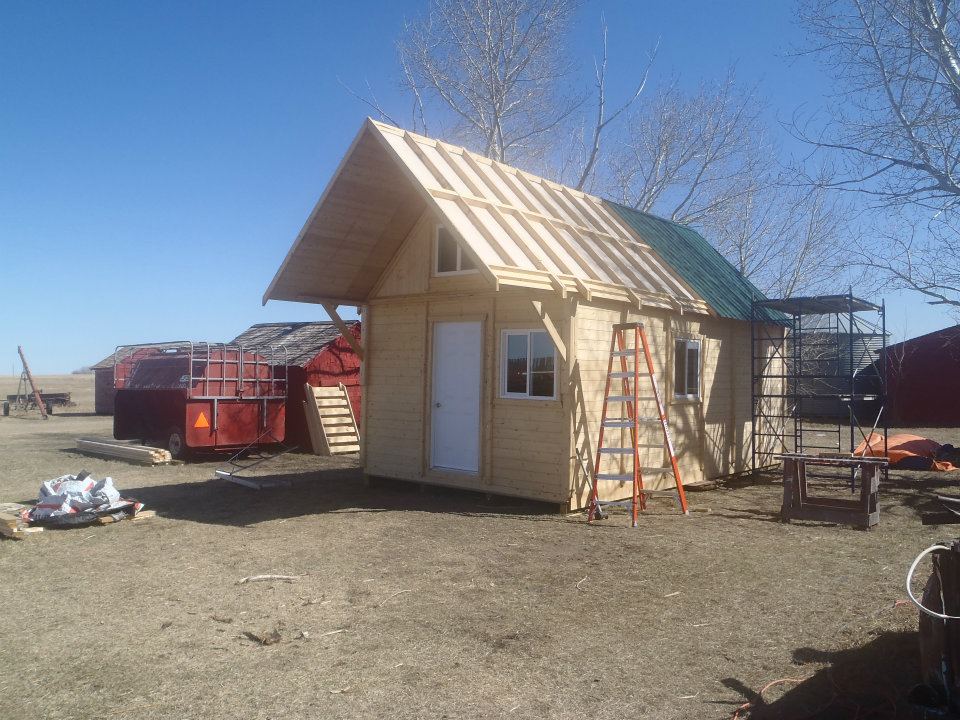
As many of you may know, when Clay and I were living in the city we had started our cow herd back home in Hanna. Because of this, we needed somewhere to stay on the weekend, somewhere to call our own, and somewhere to crash after a long cold night of calving in March. For that reason, in February 2012 we bought a  12' x 24' Knotty Pine Cabin from a Western Producer Auction for $15,000.00. I threw the price in here because everyone that knows us, knows we are CHEAP with a capital 'C'. This cabin really was affordable and by the time it was all said & done 3 years later, we not only got our use out of it, but we sold it for a decent price. I just can't stand a blog post about a DIY that doesn't include numbers, so I tried to include as much as I could in this one, however I am sure I missed a few things.

Let the fun begin- Assembly!

Picture
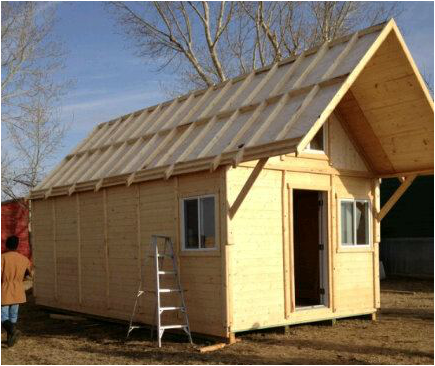
We jokingly called our little cabin the ginger bread house as we basically constructed it the same way you would the tasty Christmas treat. The walls and roof came in sections that we needed to screw together on the floor joists. Everything was pre-measured and cut, it was really just like assembling IKEA furniture, minus the allen keys, on a much larger scale. For some reason I didn't take photos of the assembly portion (or I did and they are lost in the disaster of a storage unit we have!) but it really was quite simple. Everything you need for assembly is given to you by the Knotty Pine company, right down to the screws! You can pay their company to assemble the cabin for you, which would be much quicker, but if you can run a drill you can likely do it yourself! It was that easy. It took us probably a weekend to get the floor joists done, as we wanted to make sure everything was level to start from, and then another weekend or two of work to get to the point pictured.

All of the windows and doors are already assembled in the pre-made wall sections that arrive from the company. During the ordering process you can choose where you would like windows/doors. We had a rough idea how we wanted to set up the living space, with kitchen, living room, bathroom and loft (bedroom). The only place we didn't put a window, but maybe should have, was in the bathroom.

A Few Words of advice...

 MAKE IT LEVEL. We built the floor joists on 4x6 skids so that if we ever needed to move it, we could. We are very happy we did that. However, as you can see in the picture, we put the skids right on the ground. While we leveled it as best we could, we later had shifting issues with the cabin, especially under the weight of our wood burning stove. We would highly recommend using a cement foundation, even though the cost would be higher. It will save you the headache of having doors & windows not open/close properly if a shift occurs.

INSULATION. The package we bought included floor and roof insulation only. We opted not to insulate the walls because of the extra cost, and we were happy with our choice. Because of the wood burning stove we put in, we stayed in the cabin up to -40 degrees C, however I wouldn't recommend that for everyone. More on that below...

Tinning the Roof

Picture
The roof was  bit tricky to install because of the high degree of slope. The batting insulation went in between the roof joists first, followed by a layer of plastic to keep the rain out. Finally we put the tin on top to finish. This took some acrobatics and risky maneuvers on the boys' part, because of the slippery tin. But they managed!

With Knotty Pine we were supposed to be able to choose between red and green tin for the roof, but they just sent us green (although I would have picked red). So be sure to check the colors before the delivery date.

Because we aren't tin experts we did have some uneven sheets that were noticeable at the eaves trough level. Clay ended up drawing a straight line with a chalk string and cutting the edge of the tin all the way around the exterior for a clean edge.

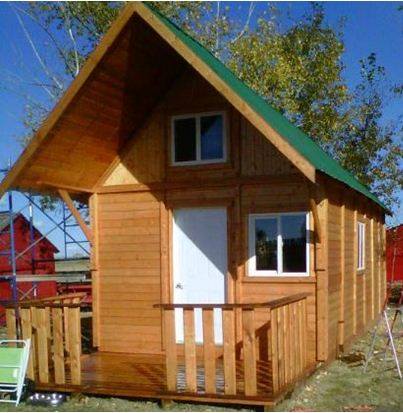
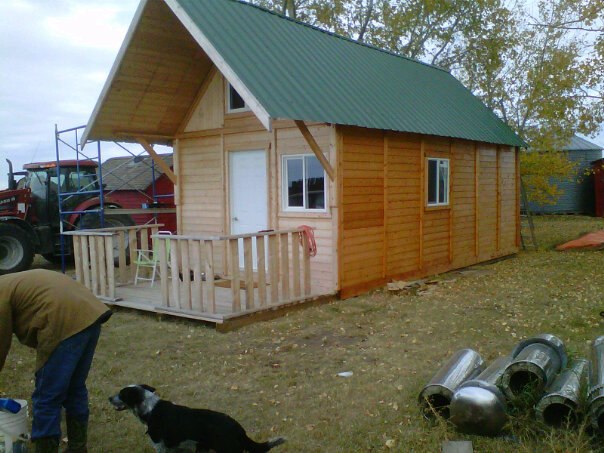
Staining the Exterior

For the exterior of the cabin we went with a home made clear coat recommended by Knotty Pine Cabins:

4.0L Linseed Oil
1.0L Diesel Fuel
0.5L Automatic Transmission Fluid (red in color)

Mix together and brush on. Apply two coats using a 4" Dutch brush.


Because the ingredients were things we already had on the farm, the price was very affordable (yay for cheap!), but we didn't feel we wanted to use that same mixture on the interior, due to the smell from the diesel. To be fair however, the clear coat only smelled until it dried, so it probably would have been fine to use on the interior as well.
Picture
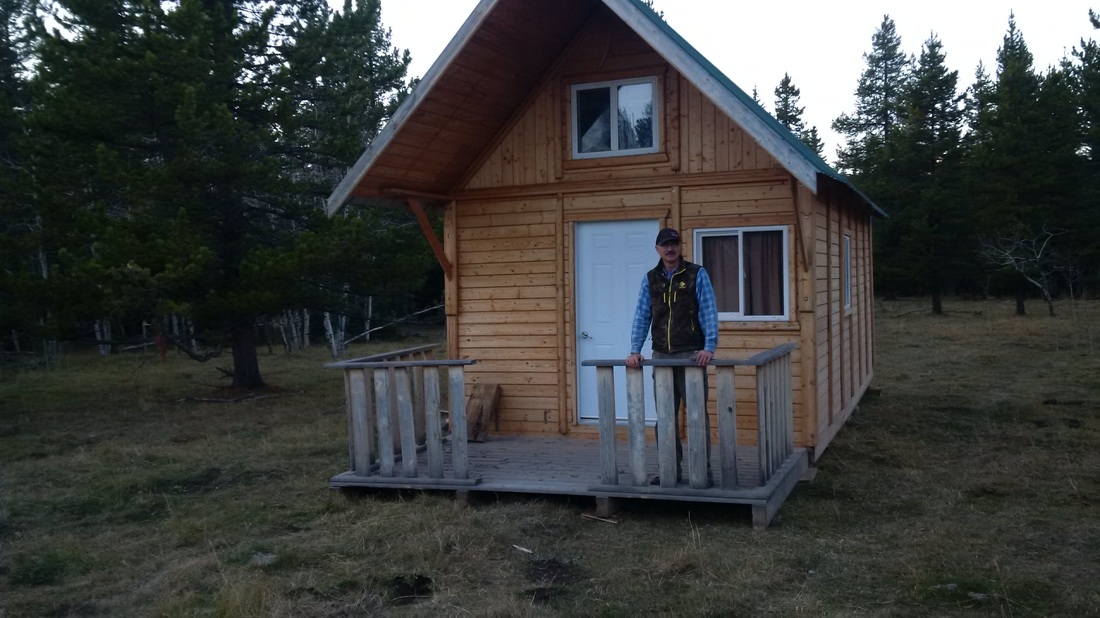
As you can see in the photo, the color turned out quite nice on the exterior. In the three years we had the cabin we did have to re-stain the exterior twice, just because it looses its shine fast. In the long run it may be worth it to use an exterior stain, provided it's finish lasts longer than a year or two.

To make the staining easier we also used a roller, instead of the 4" brush. Clay rolled the stain on (even going against the grain, you couldn't notice any streaks) and then I followed with a brush to ensure the stain reached all of the crevices and cracks. It took me an afternoon to do the entire exterior which really wasn't bad!

Staining the Interior

Picture
Staining the interior of the cabin, before the laminate floor was installed. The ladder was initially installed as per directions on the left hand side of the cabin, but we decided afterwards to move it to the middle for better flow.
The loft, ladder & interior wall you can see in the picture to the left are the only interior features included in the Knotty Pine packages. The stain and all interior finishes we completed ourselves for an extra cost.

Because the interior is obviously safe from the elements, we chose to use a store bought interior stain, as we knew we wouldn't have to re-stain for many years to come.

Now of course, for the life of me, I cannot find the extra can of stain to know what color exactly we use (sorry!). But we chose an inexpensive interior stain with no sheen. It initially went on very dark, even though our sample swatch didn't look dark at all, as you can tell by the ceiling in the photo on the left. I was definitely panicking at first, but it dried much lighter, like the walls in the bottom portion of the picture.
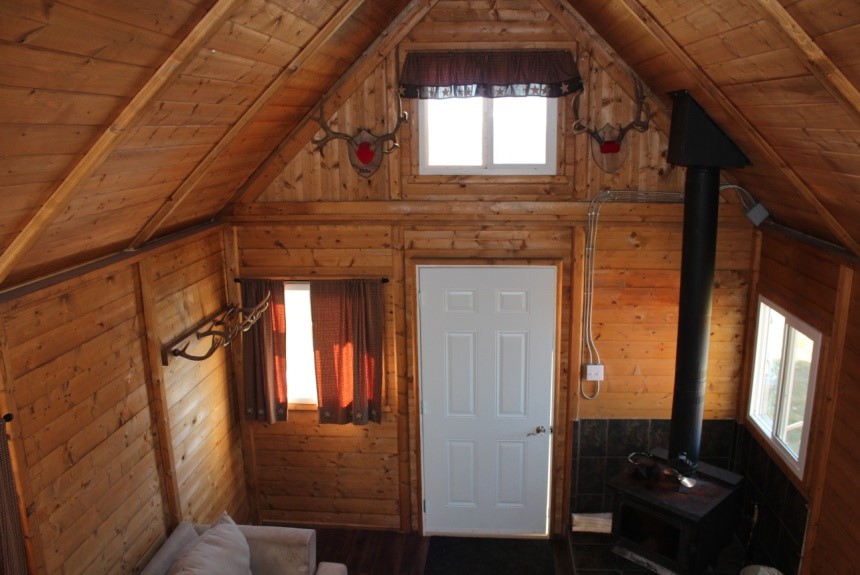
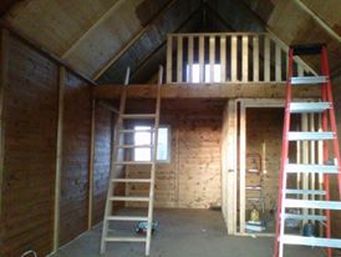
CAUTION! A big boo- boo that I made during staining can be seen in this photo. DO NOT start/stop staining n the middle of a wall/ceiling. ALWAYS start/stop at a seam, such as the vertical beams seen in the photo.

When I took the above picture I was done for the day. I had been sitting in the loft and staining as far out as I could reach. DO NOT DO THIS! When I came back to start again the next day, I had a VERY VISIBLE dark line from the overlap of the day's before stain and where I had stained that day. I never could fix it and it bothered me the entire time we had the cabin. Always stain an entire section at a time to avoid lines!!

Laminate Flooring

The Knotty Pine Cabin package does not include flooring, just a plywood base. We decided to install a (cheap!) laminate flooring on top of the plywood for easier cleaning. To get the best deal, we went to all of our local home improvement stores and looked for the cheapest option. Because the floor is such a small area (288 sq ft) we had a lot of left over inventory options. We ended up finding a click together dark laminate for $0.50/ sq ft, costing only $200 all said and done with underlay. We installed it ourselves and were quite pleased with the look. We then used 1" x 2' boards, routered with a round edge and stained the same color as our walls for baseboards.
Picture

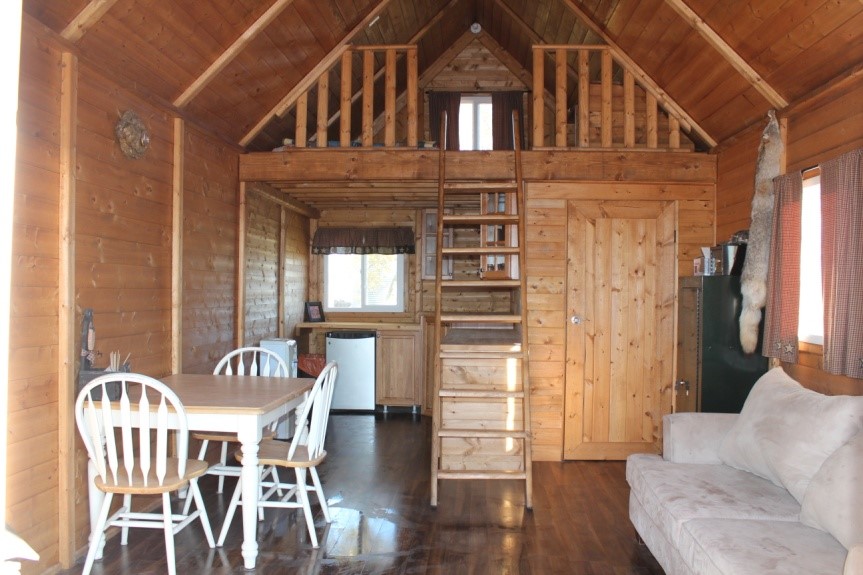
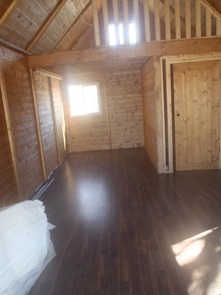
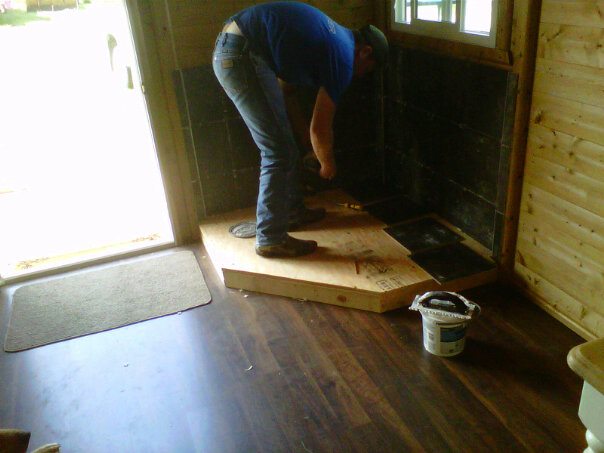
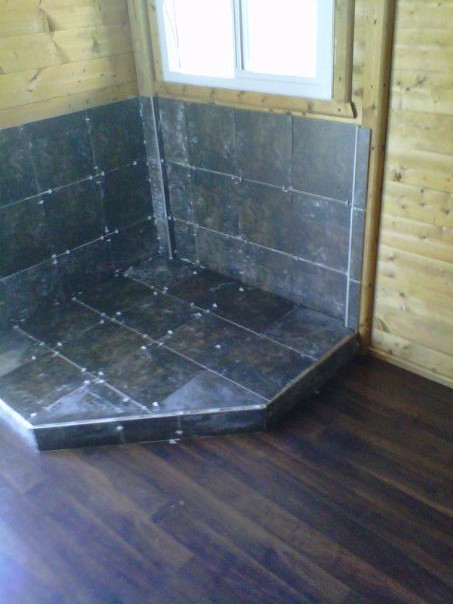
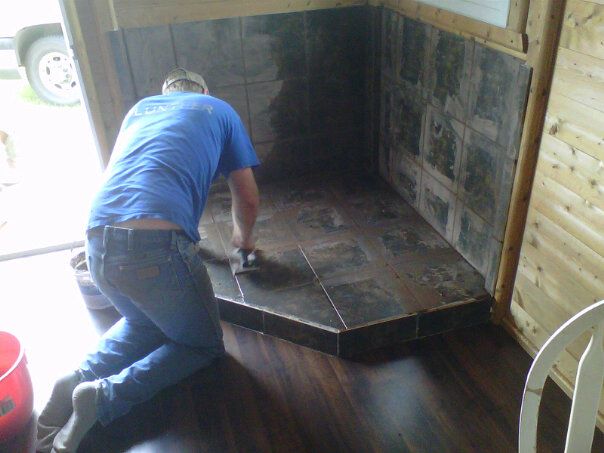
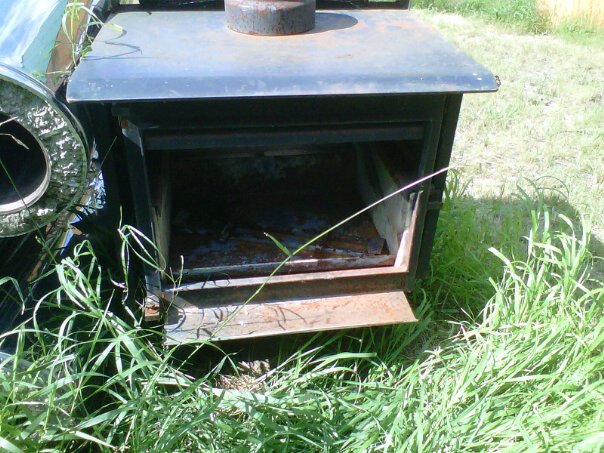
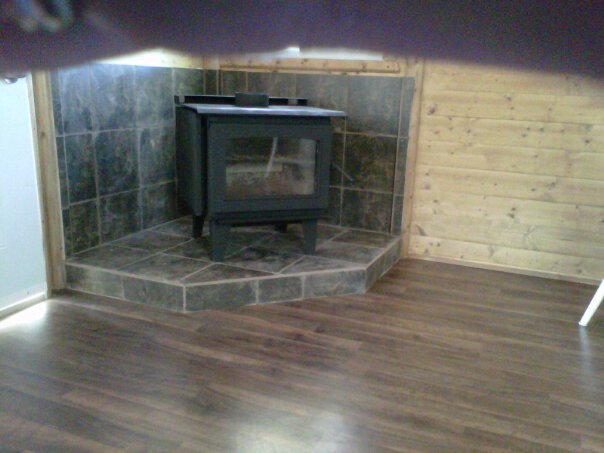
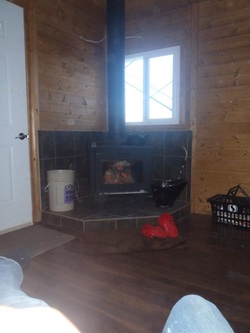
Cupboards & Countertops

Picture
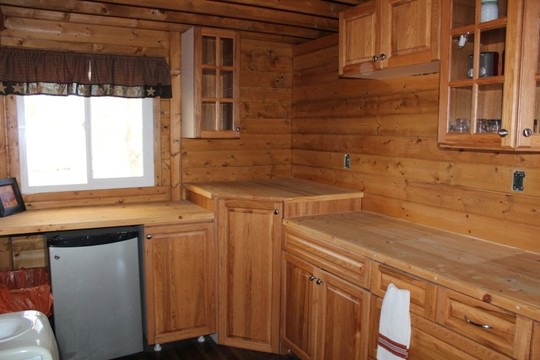
We planned on building shelves in the empty space above the corner cupboard, but never got around to it. We also planned to use leftover tile from the stove as a backsplash in the kitchen, but again, didn't get that done before we soltd it. You can also see the cut outs for the electrical sockets in this photo.
 This is the point in our renovation when you may think we have horse shoes up our butts. I wanted to have a kitchen in our cabin so we left an area open that was supposed to be designated as an additional bedroom, for our small kitchen area. We were unsure of how we were going to organize it or what to purchase for cupboards/counter tops so we advertised on our local radio station's 'Tradio' (buy, sell, swap hour) that we were looking for used cupboards. Well we hit the jackpot! A local business man had remodeled his kitchen and removed the cupboards with the intention of later using them in his garage, but never got around to it. He gave us an entire set of oak cupboards for FREE as long as we took them all! While there was a bit of juggling to make the cupboards fit and work, we ended up with something that worked for us at a price we loved!

Continuing with our wood theme, we made the countertops out of pine board, gluing two sheets together, sanding them and filling the cracks with wood filler. We then added the same 1"x2" rounded pine trim around the edges. While that wouldn't be ideal in a kitchen to be used daily, it was more than enough for what we needed. We did oil it with canola oil once a year to keep it from drying out. All together, our cupboards and countertops cost us about $50!

Wood Burning Stove

In a cabin with no utilities (initially), we needed a heat source to keep us warm during the long winter. We decided to install a wood burning stove in the corner of our cabin, purchased for $100 from Kijiji. The stove was quite rough when we got it, but it came with all of the necessary piping, so it was really a steal of deal for us. Before we could install it, we needed to heat proof the corner, which included laying tile on a small pedestal and up the walls of the cabin. The tile was bought from a home improvement store, costing us about $150 including glue and grout. Clay made quick work of his first tiling job, and did a great job might I add.
Note that the pedestal was built specifically to support the weight of the stove, which was quite heavy with all the piping installed.
Picture
It was essential that we kept a kettle of water on the wood stove, as otherwise it would get very dry, making our throats scratch and drying out the wood interior. We also had a magnetic fan that ran off the heat of the stove. This tiny little fan really made a huge difference in pushing the heat to the back of the cabin.
To spruce up the wood burning stove, (which we picked up from a corner of an old chicken coop!) we had to first take it apart. The rope seal in the door needed replacing in order to seal properly, which was a bit of a challenge to find, but we did end up finding a specialty hearth store in Calgary that helped us out. Next, we used an emery cloth to sand down the rust that had accumulated on the stove over time. We then painted it with a high temperature matte black spray paint.

This stove was, quite honestly, overkill for the small space. We would pack it full of wood before bed, put the damper on the lowest setting so we just barely had a flame, and would be warm for the majority of the night. We would usually only get up once during the night to stoke the fire and we were more than warm. In fact, I can remember laying on top of the covers with the windows wide open because it was so hot in the loft! On the really cold nights, we would start the fire as soon as we arrived, then leave for a  few hours for coffee at a relatives, and upon our return, the cabin would be warm. We would also sometimes put a lump of coal in the bottom of the stove on those -40 nights. For safety, we always had a smoke detector, Carbon Monoxide detector and fire extinguishers close by. However, we never ran into any issues. Be sure to check with your local fire department before installing any type of fireplace for regulations, safety measures and training.
Overall, our wood stove cost us about $200 installed.

Utilities

We eventually did decide we wanted some utilities in our cabin. We had a journeyman electrician run some cable on the interior walls for light switches and plug ins. We didn't need much because it truly was just a weekend cabin. He then wired the electrical panel to be able to be plugged in to an outlet or a generator, as our thoughts were that we may move it one day to another location. Luckily, that journeyman was our relative and graciously did the work for just the cost of materials and a case of beer. I believe we spent about $250 on this portion of the renovation.

We had planned to eventually put water & sewer in the cabin as well, but never got around to it. We did designate a 'closet', as we called it, for our bathroom, but never ended up doing any work to it before we sold the cabin.

Because the cabin was on skids and had no permanent utilities, our municipality did not require us to purchase any building or utility permits. It would be important to check out the requirements in your area before doing any work.

Farewell Cabin!

Picture
Wade's House Moving loaded up the cabin for its journey to the mountains
We truly enjoyed our cabin and had big plans for more renovations, however once we were able to move to Hanna for good, we had no use for it anymore. With very sad hearts, we sold the cabin to new owners that moved it to a wooded hunting spot in the mountains.

Our advice to anyone building a small cabin would be to take your time- this cabin definitely didn't come together over night. It was a labor of love, which made the whole process so much more enjoyable. Clay and I were able to try our hand at lots of different carpentry techniques, learning lots along the way, and many that we will use in the renovation of our new home.
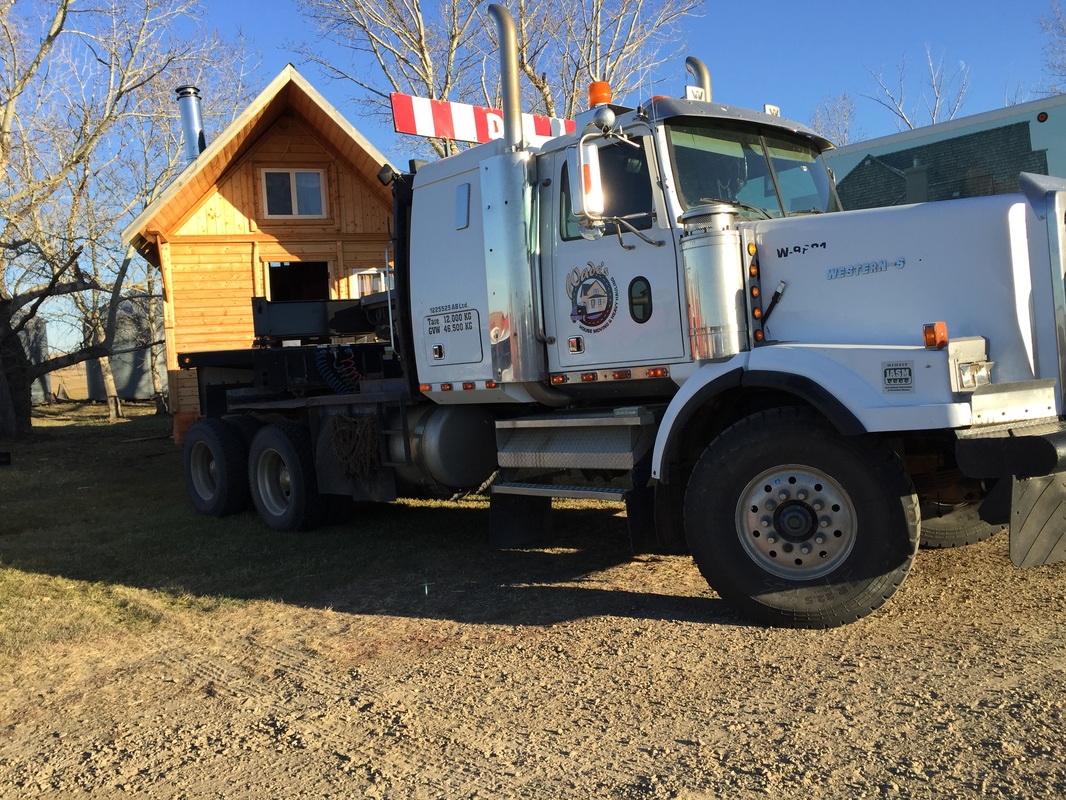
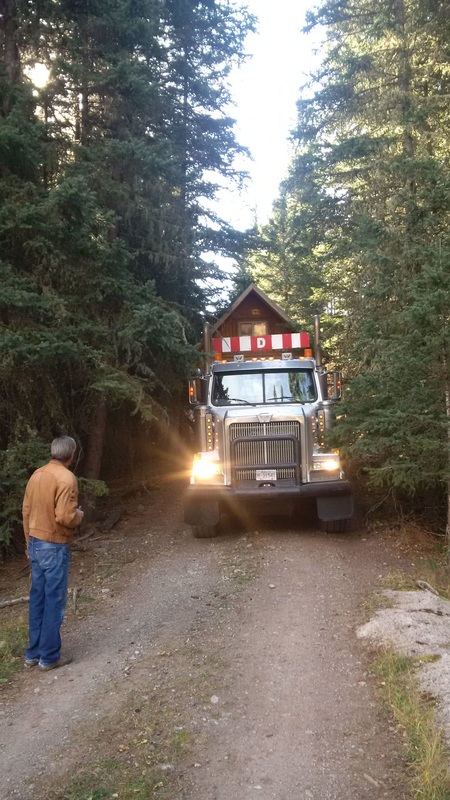
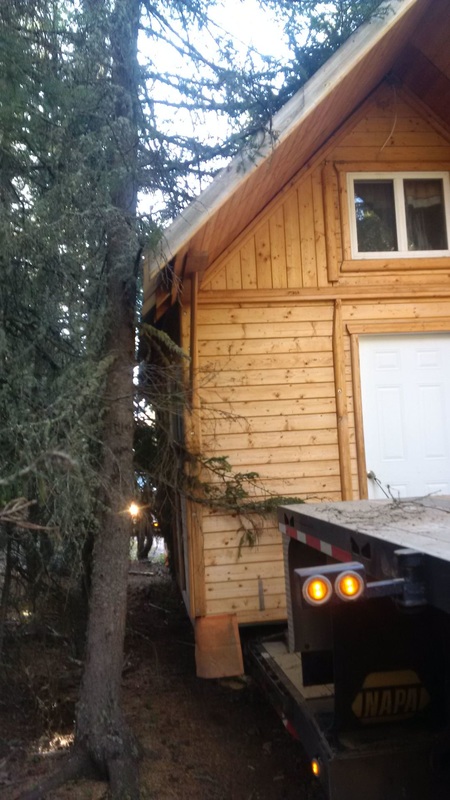
The individual who bought our cabin was nice enough to send us these pictures of the big move. Looks like it was a tight fit but the cabin looks like it belongs in those trees.I hope the new owners enjoy their little gingerbread house as much as we did!
0 Comments


Leave a Reply.

    Picture
     A Blog About Our Life, Love & Lessons Learned on the Ranch

    Categories

    All
    Alberta Beef
    #Buildingafarm
    Cattle Links
    Digital Scrapbook
    For Sale
    For The Dogs
    From The Kitchen
    My Badlands
    On The Farm

    RSS Feed

    Instagram

    Latest Posts

    • HerdTrax Software Review
    • ​Experience the Badlands
    • #BeforeThePlate, Challenge Accepted
    • Digital Scrapbook of December '16
    • Digital Scrapbook of November '16
    • 4 Reasons Why Every Rancher Should Experience Farmfair International
    • Blow Drying Cows & more Farmfair International Fun
    • Digital Scrapbook of October '16
    • Digital Scrapbook of September ‘16
    • Sustainable Beef. It’s Happening All Around Us
    • The Canadian Ag Challenge
    • Digital Scrapbook- August ‘16
    • Married {with Cows} for 5 Years!
    • Chunky Zucchini Salsa Recipe
    • Digital Scrapbook- July ’16
    • Women’s Grazing School Part II
    • Digital Scrapbook- June ‘16
    • Women’s Grazing School Part I
    • Digital Scrapbook- May '16
    • My Take on the Earls Beef Marketing Rollercoaster
    • Branding Menu Make-Aheads
    • Digital Scrapbook- April '16
    • Digital Scrapbook-March '16
    • Our Cow/Calf Tagging System
    • Digital Scrapbook- Feb 16
    • What's in Your Calving Toolbox? (+ Free Printable!)​
    • Why We're Unrolling Bales Instead of Bale Grazing
    • 25 Things I learned When I Married a Rancher
    • Digital Scrapbook- January ’16  

    Archives

    August 2019
    July 2019
    July 2018
    April 2018
    May 2017
    January 2017
    November 2016
    October 2016
    September 2016
    August 2016
    July 2016
    May 2016
    March 2016
    February 2016
    January 2016
    December 2015
    November 2015
    August 2015
    May 2015
    March 2015
    November 2014
    October 2014
    June 2014
    April 2014
    February 2014
    December 2013
    October 2013
    September 2013
    August 2013
    July 2013

Powered by Create your own unique website with customizable templates.
  • Home
  • Cattle
    • Whiskey Creek Bred Heifers & Cows
    • Whiskey Creek Replacement Heifers
    • Land Stewardship
  • Labrador Retrievers
    • Our Females
    • Available Litters
    • Purchase Information
    • Health & Nutrition
  • Meet the Ranchers
  • Married {with Cows} BLOG
  • Contact