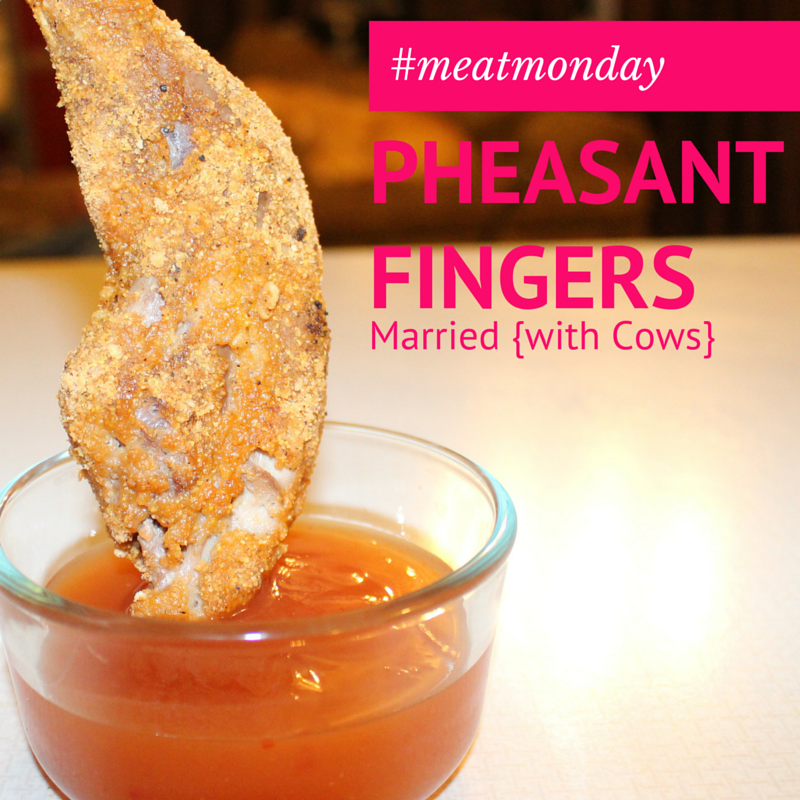
 This recipe is pretty straight forward but a quick and easy hit. Ingredients: Pheasant legs or breasts (cut into slices) Shake & Bake flakes Eggs After washing your pheasant legs or breasts (and removing all pellets!) coat with egg and then throw them in a bag of Shake & Bake (purchased or make your own). Lay on a cookie sheet and cook on 400F for 20 minutes or until cooked. You may also like these other #meatmonday recipes... 4 Favorite Pheasant Feasts
Apple Pheasant Bake Peasant's Pheasant Pot Pie Pheasant Sliders Big Game Sausage Easy Smoked Deer Roast
0 Comments
Posted By: Jesse Williams Have you heard of #meatlessmonday? It's a popular hashtag on social media these days, used for advertising dinner recipes that don't include any meat. It has popped up in my news feed a lot lately and I can only assume it has something to do with the rising cost of meat as a protein these days. While we are cattle producers and certainly enjoy a cost reduction on our home grown beef, I cringe every single time I reach for a different meat source at the grocery store. And because I am SO cheap, I try to avoid buying meat at all costs. To get us through the winter, my hubs does a lot of game hunting, allowing us a great variety of protein sources for our diet, without breaking the bank! Over the month of January Clay and I will be posting some of our favorite winter wild game recipes each Monday using the hashtag #MeatMonday. So get your crock pots warm and your smokers ready, because there are tried, true & old fashioned wild game recipes coming your way! 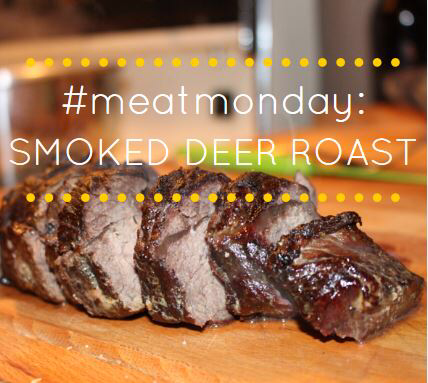 Smoked Deer Roasts Of course this starts back in November, in our area, when you can hunt for mule and white-tailed deer with appropriate licenses within a certain season. Clay was drawn for and shot both a white tailed buck and a mule doe this year. Because of our nice chilly Alberta winters, we are able to skin and hang our deer in an un-heated shop until we are ready to butcher. The carcass stays frozen and is protected from scavengers. To make processing easier, we usually wait for 2-3 friends or relatives to shoot their deer, before we all butcher the animals together. Many hands make for light work, and that way we can share all of the deer between families. We typically divide our meat into two categories; back straps are saved for deer roasts and the rest of the animal is ground for sausage (click here for our Big Game Sausage Recipe). I am sure you could get a lot fancier with your cuts if you wished, but this suits are families just fine. Once off the carcass, the back straps are simply cut into family sized roasts, which in our case, are quite small, seeing how there are only two of us! From there, they go straight into the smoker. Our roasts are typically smoked for 4 hours. They are essentially cold cooked by the time they are taken out, but we really like the smokey flavor and the tenderness it lends. After smoking we package the roasts for the freezer, wrapping them in freezer paper and tape. Don't forget to label them with the date! Oven Baking
BarbequeMore often than not we cook our deer roast on the Barbeque. It's quicker and easier (because that's the hub's domain!) and involved less dishes.
Thaw your deer roast and throw it directly on the Barbeque rack on high heat for 40 minutes to an hour and voila! The outside will be crispy but the inside will still be tender and juicy! We also find that more of the smokey flavor shines through with the Barbeque rather than the oven, but it's all about your preferences. Sometimes we do add some Barbeque sauce to add an extra kick. 
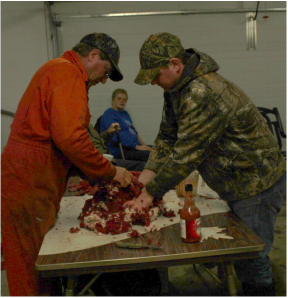
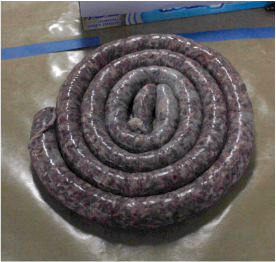
Posted By: Jesse Williams 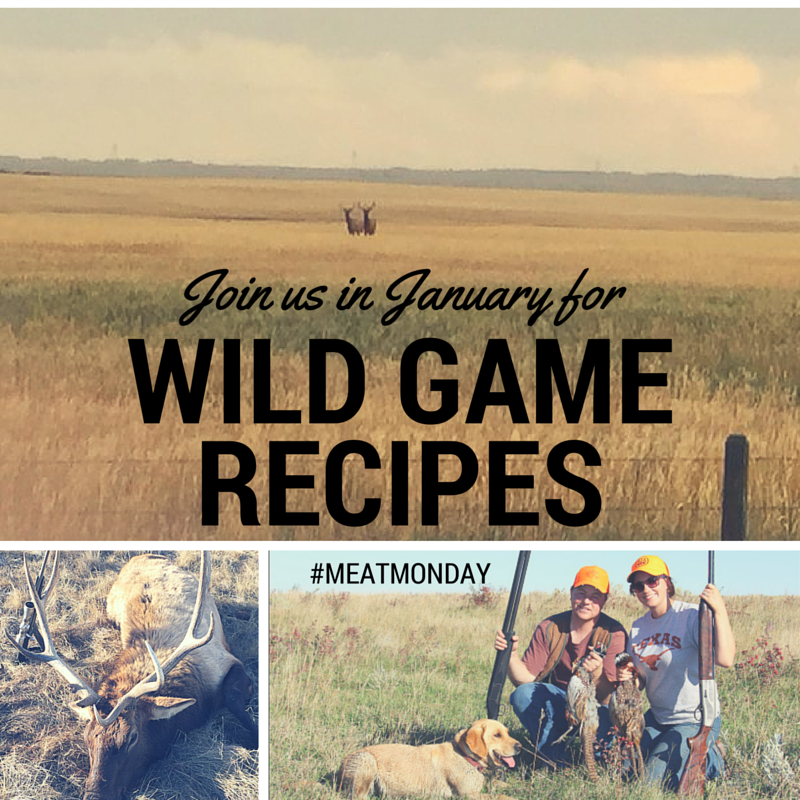 Both my family & Clay's are game hunters, so growing up I knew that the new year meant deer sausage making time! It often involved a ton of cousins, friends and neighbours, a fair bit of liquor and a long day of fun. Depending on the tags we are drawn for, we usually butcher 3-5 deer per year and split it between 2 -3 families. Since I got married, we have been making our deer sausage with my brothers-in law, but the same trusty recipe from my mom & dad Baron still holds tried, true & my favorite! Baron Garlic Sausage -100 lb Batch 60lbs of deer/ 40 lbs of pork Each year we seem to waiver on this. Depending on how much fat you keep from your deer, and if you use trimmings, fat or the whole pig carcass, you will want to adjust the ratio of deer to pork. This year we did 70/30 because the pork trimmings were almost entirely fat. Just fry up a patty sample of your mixture and see if you like the fat content. You can always add more deer or pork to your liking. We use the same garlic recipe below for our moose and elk sausage. When I was little, we used to raise our own butcher pigs just for sausage. Nowadays, with an anti-pig husband (sigh!), our best luck is to buy a mature butcher pig from the local Hutterite Colony. Sometimes they will even butcher it for you, or you can take it to a local butcher and have it done the way you like, leaving out the good cuts for your freezer. Spice Mixture (for 100 lbs) Mix together & sprinkle over the ground meat: 1 cup sea salt (or non-iodized salt) 1 cup black pepper 1 cup garlic salt 1/4 cup tender quick Add to meat after the dry ingredients: 1 1/2 cups minced garlic in 3 cups of boiling water* **This is my mom's trick. Soak the minced garlic (you can buy it minced at the store, or spend hours peeling & mincing yourself) in the boiling water. We do these up a bit ahead of time, put the 3 cup mixture in jars and let the water infuse with the garlic. The liquid helps to mix the ingredients together, and the temperature helps keep mixing hands warm, especially when the ground meat was frozen previously! You can add more boiling water if needed to make the meat easier to mix.
Casings Mom says the best casing are sheep gut casings and we have a tradition of getting them from Brooks Meat Packers, a local butcher shop. We seemed to have had the best luck there, as other sources have given us casings that broke very easily and made sausage making a nightmare. I am sure there are many different types and sources that work, but we tend to stick to what has served us well in the past. Soak your thawed casing salted water prior to use. Keep them in the water until you are about to thread them onto the sausage press. Don't allow them to dry out.
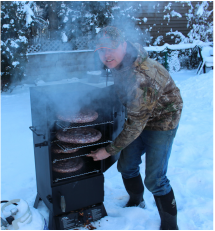
Smoking
PackagingSome people get fancy with their packaging using vacuum sealers, but even doing 3 or 4 deer per year, we always run out before the year ends, so paper packing works just fine for us. If you are planning on keeping your sausage for long periods of time in the freezer, maybe a vacuum sealing system would be better for you to prevent spoiling. 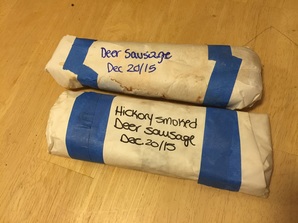 We purchase freezer paper (paper on one side, wax on the other) from our local grocery store. You can usually buy it in 50 ft rolls. For 300 lbs of sausage this year, we used about 250 ft of paper, however it will vary based on your wrapping technique and size of packages. Tape seems to be a big issue for us. You can purchase Freezer Tape which is specifically made for wrapping items for the freezer. It looks like regular masking tape, but trust me- masking tape doesn't work! The second it hits the freezer it loses its stickiness and just falls off! I had some freezer tape left over from a few years ago, stored in cold storage (our c-can), and when I took it out to use this year I was very disappointed. Apparently it cannot be frozen (prior to use). It wouldn't even come off the roll! So if you do manage to find the elusive freezer tape, store it inside for next time! I have purchased Freezer Tape at our local grocery store before, however this year it was impossible to find. You may want to try you local hardware store or Canadian Tire, although it can be quite tricky to get a hold of. Because we were low this year, we tried a number of different tapes. All-Weather Scotch tape (blue) seemed to work great. We actually found it in the painting section at Canadian Tire. It looks a lot like painting tape. We also tried a very thin, plastic sealing tape recommended by our local hunting store, but it was hard to use, and had to use a lot of it to make it to stick. LabelingWe don't do anything fancy here. We just use permanent marker to write the type of deer sausage it is, and the date. This way we can identify how old something in the bottom of our freezer is (although we never seem to have to worry about freshness when it goes so fast!). After all that work, now sit back, kick your feet up and enjoy the fruits of your labor! We would love to hear your feedback, comments or suggestions if you make your own deer sausage. We are by no means experts, but we do have a ton of fun and get a lot of satisfaction knowing we have a freezer full of meat to enjoy all year round. Cook up a batch & enjoy! You may also like these other #meatmonday recipes...
Posted by: Jesse Williams
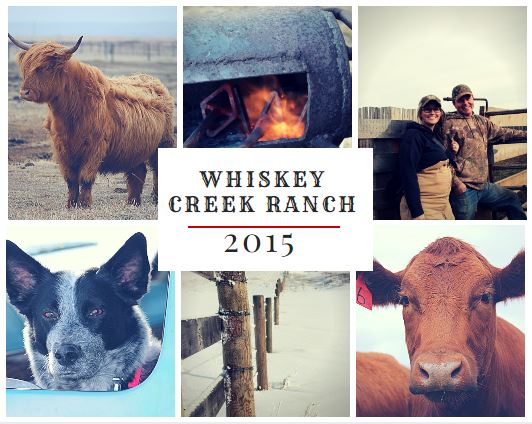
2015 was truly a whirlwind of a year for us, both on and off the ranch! We saw some major changes including Clay quitting his engineering gig to start his own water well drilling company,Legacy Drilling (yes, that was a shameless plug!) while I changed jobs to be based closer to home and more in my field of expertise. Clay also earned his Professional Engineering status from the Association of Professional Engineers & Geoscientists of Alberta- an honor he worked hard to deserve.
We FINALLY sold our acreage in Strathmore, after being on the market for over a year and struggling with renters and the challenge that two home bases bring. I was SO excited to sell our acreage that 13 hours (literally) after the ink had dried on that deal, Clay and I bought our forever home, which will be moved in three pieces onto our new farm site south of Hanna in June 2016. Can I get a WAHOO!?!? We increased our herd size this year, adding more yearling heifers to the bunch. We also added two new Charolais bulls for our cow herd to put some serious pounds on the ground with tan calves for 2016. Our heifers were bred Gelbvieh, a family favorite, of course. We sold our first crop of calves at Balog Auction in October, and were very pleased that they sold in only 3 bunches. Certainly no complaints here! Our farm site sure looks different now than when 2015 was rang in. We added utilities (gas, water, power), built a calving barn/three-sided shed combo, moved an arch-ribbed shop onto location and now have a passable driveway (yay!). We spent a lot of time cleaning up an old farm/junk site just northeast of our new yard, and hopefully 2016 will bring the rest of it up to par. Writing down all of the changes that happened this year doesn't seem as hectic as it really felt. I feel like I haven't put my feet up all year! Regardless, this has been our best year yet and we are so happy and proud to have shared it with amazing family and friends. There are so many people that have helped make our year what it was, and we are ever so grateful. Here is to you & yours. We wish you all the best in 2016 and hope you stop by for a coffee. The door is always open! -Clay & Jesse Williams Take a peek at our year...
You may have known that Clay bought me a camera in 2014 for Christmas. Well, I have been snapping photos all year long and decided to put together a snapshot of our year on the ranch to have as a keepsake. Now of course, it is obnoxiously long with way too many cow photos, but that has been the center of our life this past year so I couldn't shorten it up! Have a browse through, as Clay assures me that nobody but us can watch cows for 9.5 minutes ;)
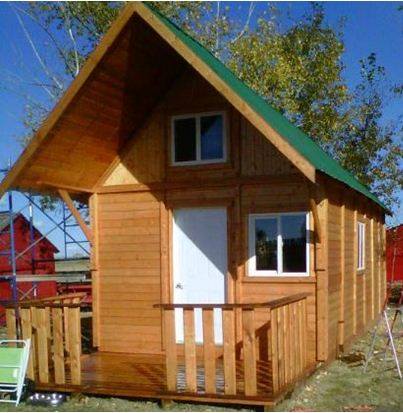
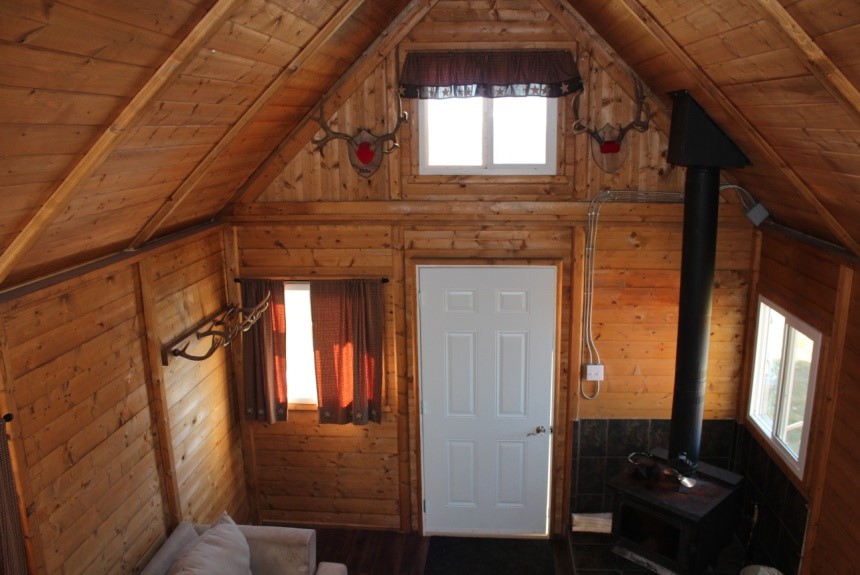
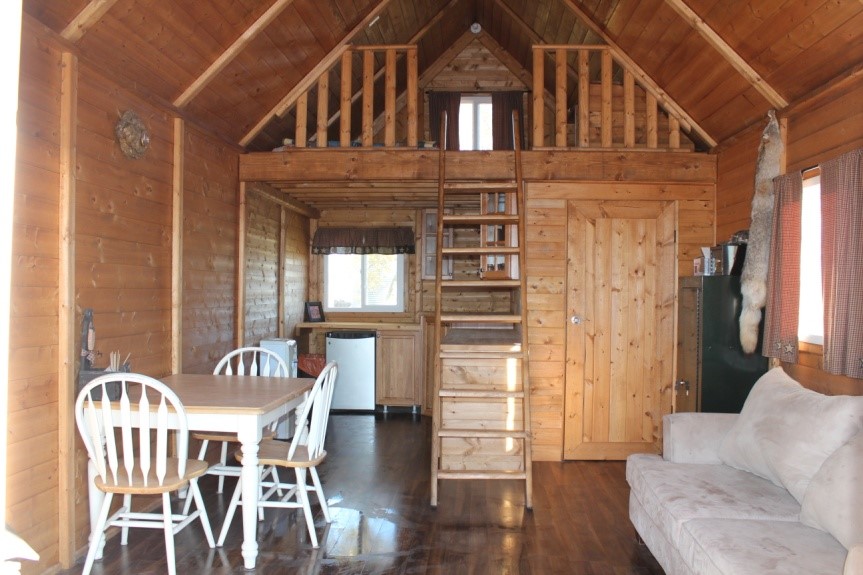
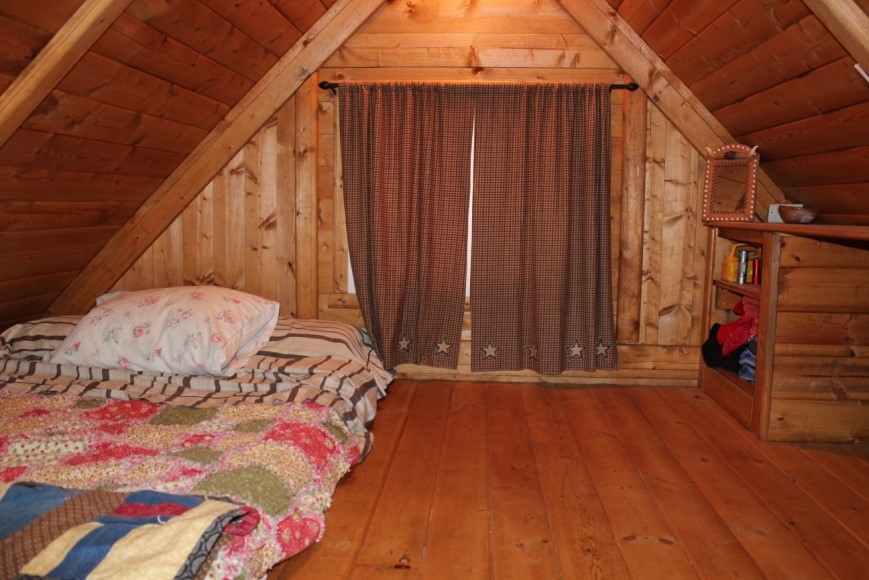
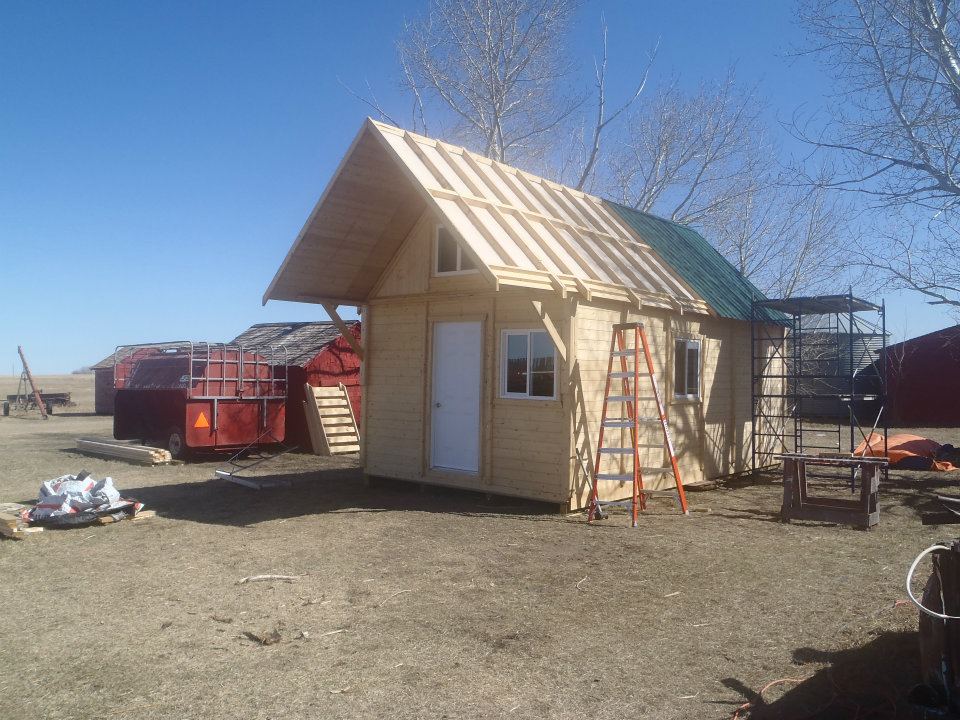
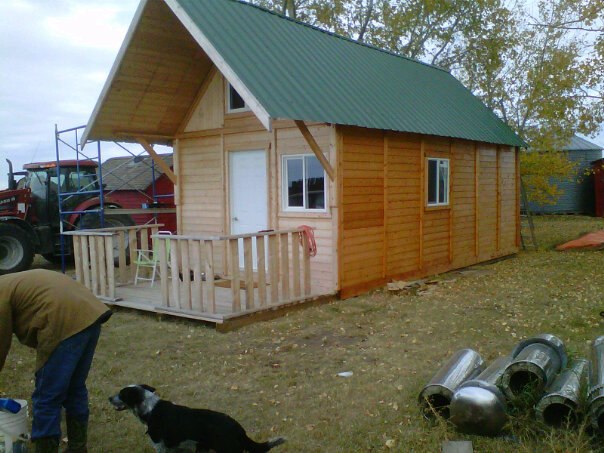
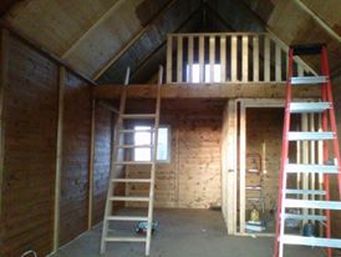
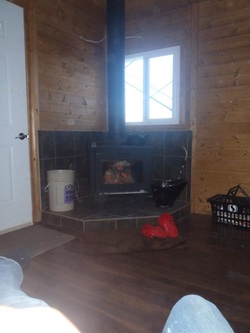
Click here for the mobile version (no music) As many of you may know, when Clay and I were living in the city we had started our cow herd back home in Hanna. Because of this, we needed somewhere to stay on the weekend, somewhere to call our own, and somewhere to crash after a long cold night of calving in March. For that reason, in February 2012 we bought a 12' x 24' Knotty Pine Cabin from a Western Producer Auction. I threw the price in here because everyone that knows us, knows we are CHEAP with a capital 'C'. Let the fun begin- Assembly! 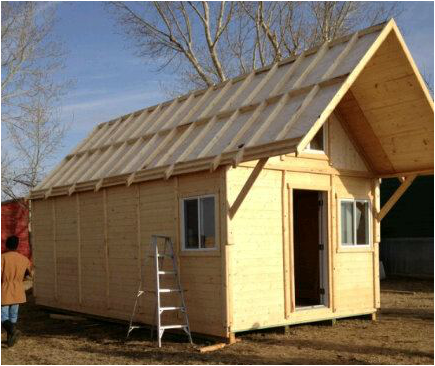 We jokingly called our little cabin the ginger bread house as we basically constructed it the same way you would the tasty Christmas treat. The walls and roof came in sections that we needed to screw together on the floor joists. Everything was pre-measured and cut, it was really just like assembling IKEA furniture, minus the allen keys, on a much larger scale. For some reason I didn't take photos of the assembly portion (or I did and they are lost in the disaster of a storage unit we have!) but it really was quite simple. Everything you need for assembly is given to you by the Knotty Pine company, right down to the screws! You can pay their company to assemble the cabin for you, which would be much quicker, but if you can run a drill you can likely do it yourself! It was that easy. It took us probably a weekend to get the floor joists done, as we wanted to make sure everything was level to start from, and then another weekend or two of work to get to the point pictured. All of the windows and doors are already assembled in the pre-made wall sections that arrive from the company. During the ordering process you can choose where you would like windows/doors. We had a rough idea how we wanted to set up the living space, with kitchen, living room, bathroom and loft (bedroom). The only place we didn't put a window, but maybe should have, was in the bathroom. A Few Words of advice... MAKE IT LEVEL. We built the floor joists on 4x6 skids so that if we ever needed to move it, we could. We are very happy we did that. However, as you can see in the picture, we put the skids right on the ground. While we leveled it as best we could, we later had shifting issues with the cabin, especially under the weight of our wood burning stove. We would highly recommend using a cement foundation, even though the cost would be higher. It will save you the headache of having doors & windows not open/close properly if a shift occurs. INSULATION. The package we bought included floor and roof insulation only. We opted not to insulate the walls because of the extra cost, and we were happy with our choice. Because of the wood burning stove we put in, we stayed in the cabin up to -40 degrees C, however I wouldn't recommend that for everyone. More on that below...
Staining the Exterior
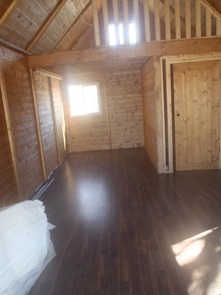
As you can see in the photo, the color turned out quite nice on the exterior. In the three years we had the cabin we did have to re-stain the exterior twice, just because it looses its shine fast. In the long run it may be worth it to use an exterior stain, provided it's finish lasts longer than a year or two. To make the staining easier we also used a roller, instead of the 4" brush. Clay rolled the stain on (even going against the grain, you couldn't notice any streaks) and then I followed with a brush to ensure the stain reached all of the crevices and cracks. It took me an afternoon to do the entire exterior which really wasn't bad! Staining the Interior
CAUTION! A big boo- boo that I made during staining can be seen in this photo. DO NOT start/stop staining n the middle of a wall/ceiling. ALWAYS start/stop at a seam, such as the vertical beams seen in the photo. When I took the above picture I was done for the day. I had been sitting in the loft and staining as far out as I could reach. DO NOT DO THIS! When I came back to start again the next day, I had a VERY VISIBLE dark line from the overlap of the day's before stain and where I had stained that day. I never could fix it and it bothered me the entire time we had the cabin. Always stain an entire section at a time to avoid lines!!
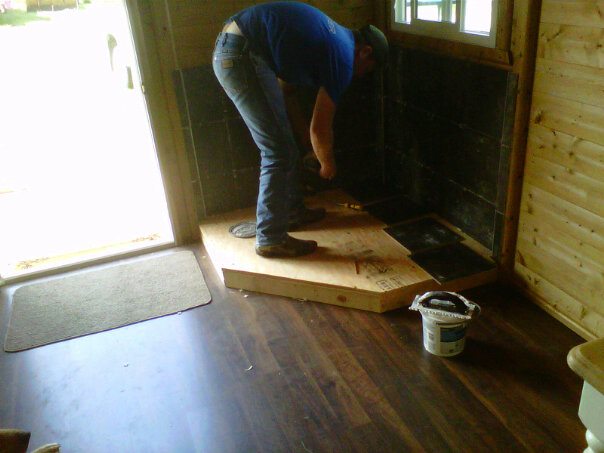
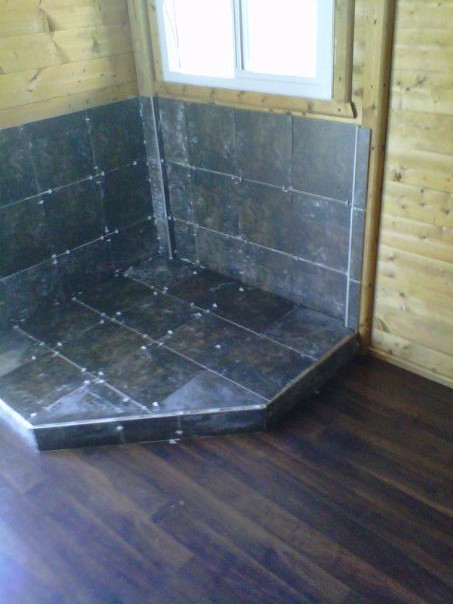
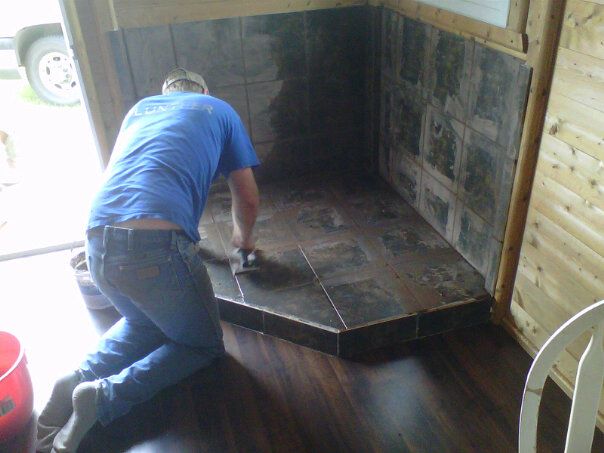
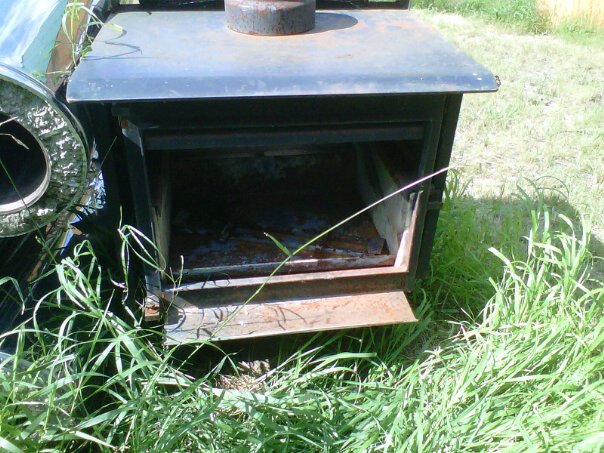
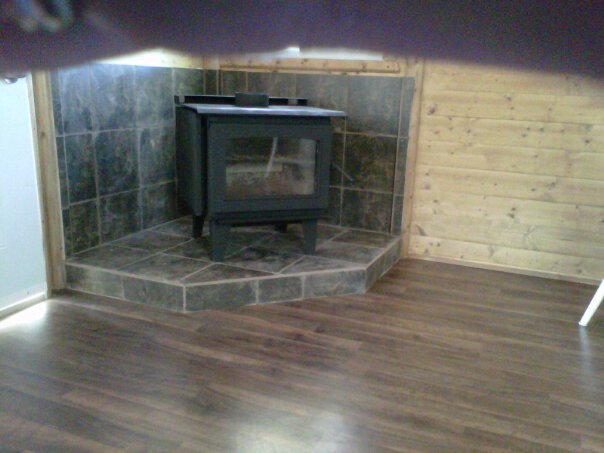
Cupboards & Countertops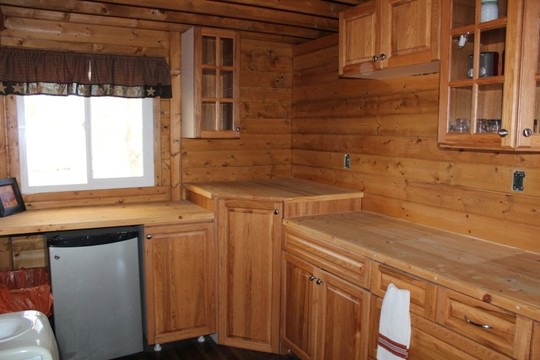 We planned on building shelves in the empty space above the corner cupboard, but never got around to it. We also planned to use leftover tile from the stove as a backsplash in the kitchen, but again, didn't get that done before we soltd it. You can also see the cut outs for the electrical sockets in this photo. This is the point in our renovation when you may think we have horse shoes up our butts. I wanted to have a kitchen in our cabin so we left an area open that was supposed to be designated as an additional bedroom, for our small kitchen area. We were unsure of how we were going to organize it or what to purchase for cupboards/counter tops so we advertised on our local radio station's 'Tradio' (buy, sell, swap hour) that we were looking for used cupboards. Well we hit the jackpot! A local business man had remodeled his kitchen and removed the cupboards with the intention of later using them in his garage, but never got around to it. He gave us an entire set of oak cupboards for FREE as long as we took them all! While there was a bit of juggling to make the cupboards fit and work, we ended up with something that worked for us at a price we loved! Continuing with our wood theme, we made the countertops out of pine board, gluing two sheets together, sanding them and filling the cracks with wood filler. We then added the same 1"x2" rounded pine trim around the edges. While that wouldn't be ideal in a kitchen to be used daily, it was more than enough for what we needed. We did oil it with canola oil once a year to keep it from drying out. Wood Burning Stove In a cabin with no utilities (initially), we needed a heat source to keep us warm during the long winter. We decided to install a wood burning stove in the corner of our cabin, purchased from Kijiji. The stove was quite rough when we got it, but it came with all of the necessary piping, so it was really a steal of deal for us. Before we could install it, we needed to heat proof the corner, which included laying tile on a small pedestal and up the walls of the cabin. The tile was bought from a home improvement store. Clay made quick work of his first tiling job, and did a great job might I add. Note that the pedestal was built specifically to support the weight of the stove, which was quite heavy with all the piping installed.
UtilitiesWe eventually did decide we wanted some utilities in our cabin. We had a journeyman electrician run some cable on the interior walls for light switches and plug ins. We didn't need much because it truly was just a weekend cabin. He then wired the electrical panel to be able to be plugged in to an outlet or a generator, as our thoughts were that we may move it one day to another location. Luckily, that journeyman was our relative and graciously did the work for just the cost of materials and a case of beer. We had planned to eventually put water & sewer in the cabin as well, but never got around to it. We did designate a 'closet', as we called it, for our bathroom, but never ended up doing any work to it before we sold the cabin. Because the cabin was on skids and had no permanent utilities, our municipality did not require us to purchase any building or utility permits. It would be important to check out the requirements in your area before doing any work. Farewell Cabin!
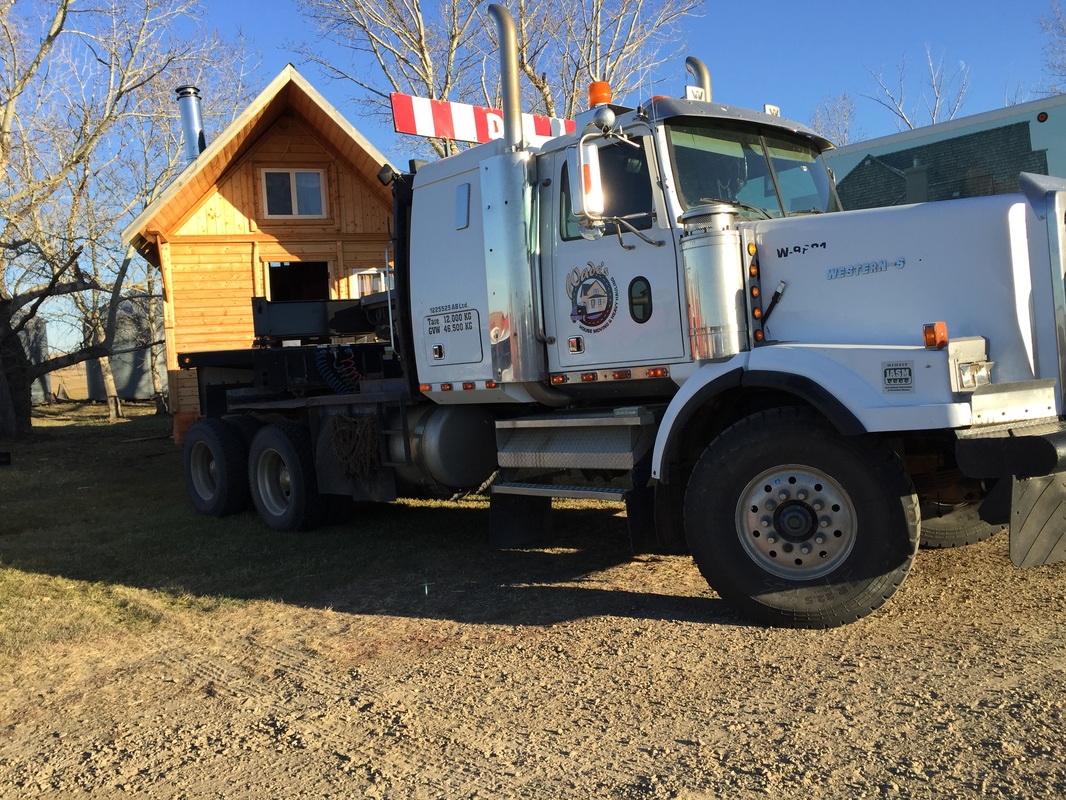
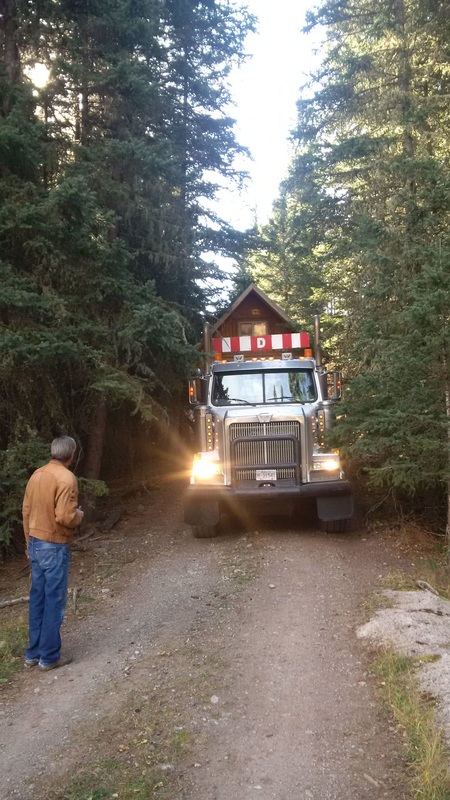
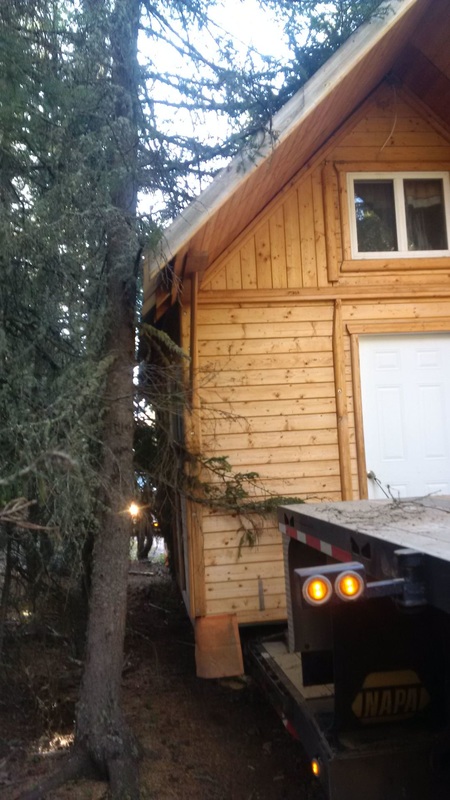
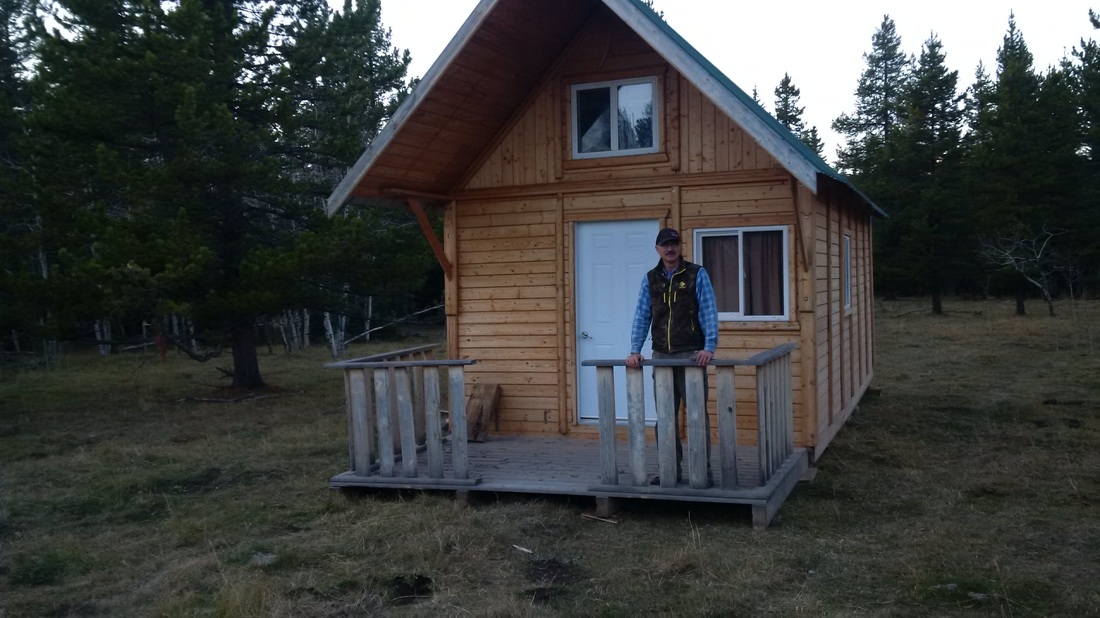
The individual who bought our cabin was nice enough to send us these pictures of the big move. Looks like it was a tight fit but the cabin looks like it belongs in those trees.I hope the new owners enjoy their little gingerbread house as much as we did!
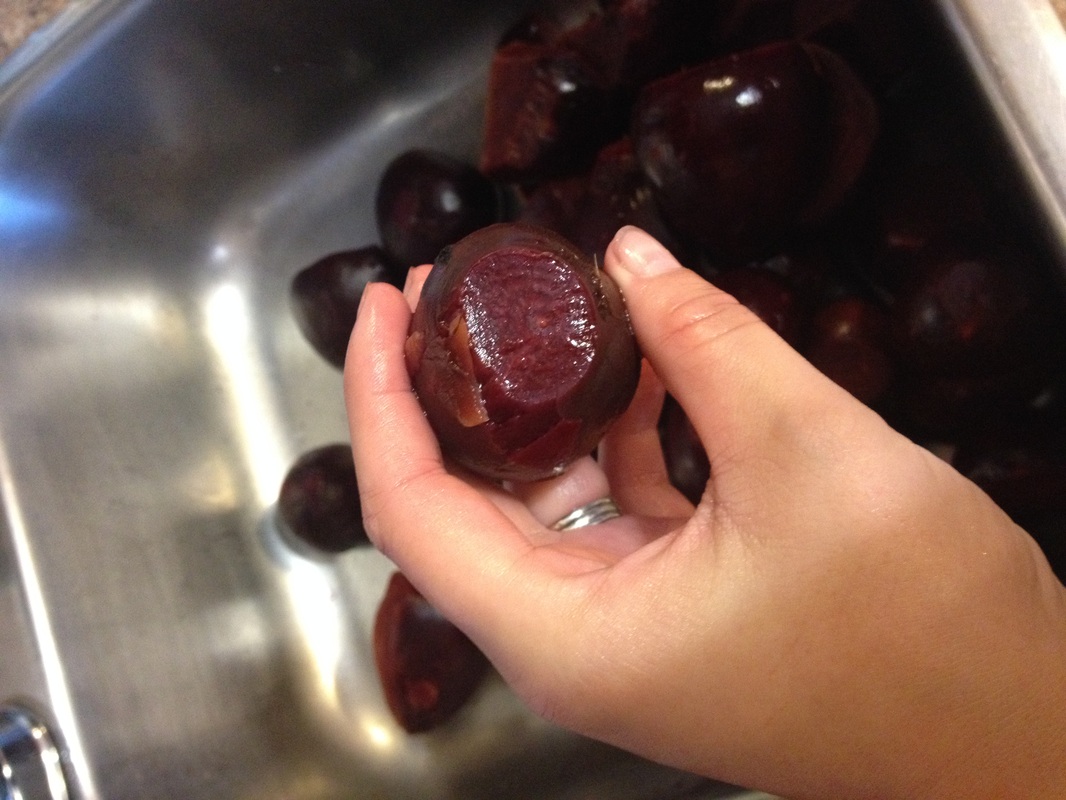
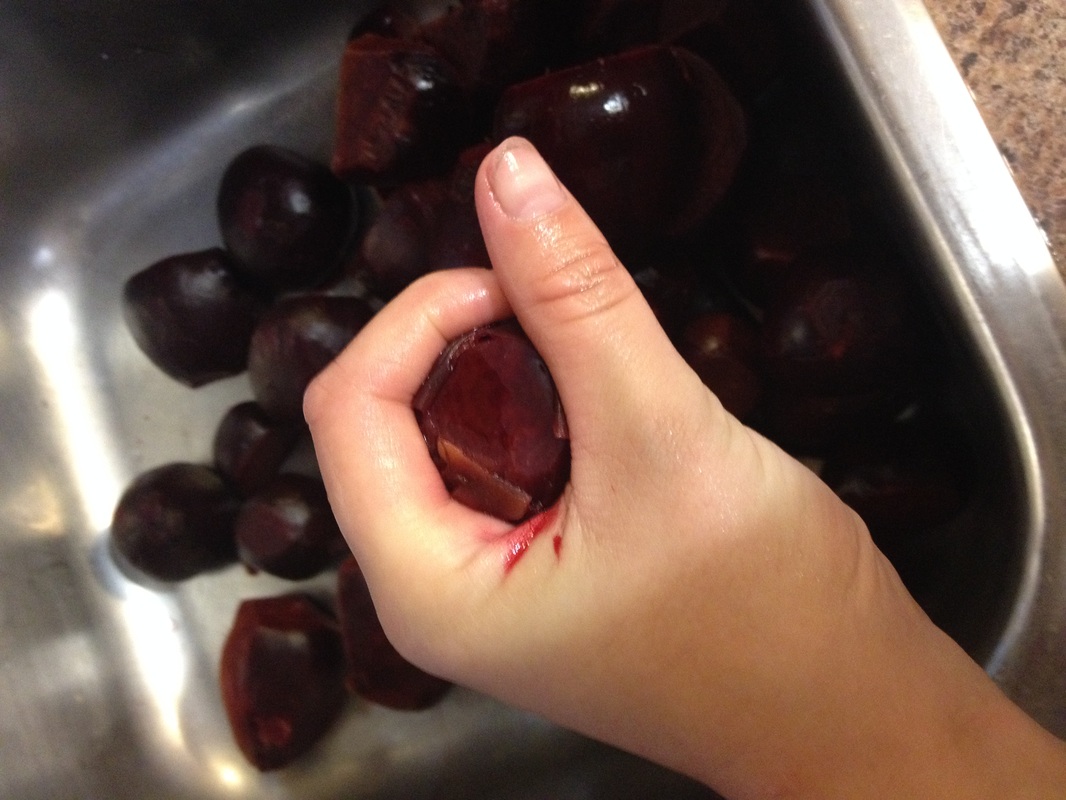
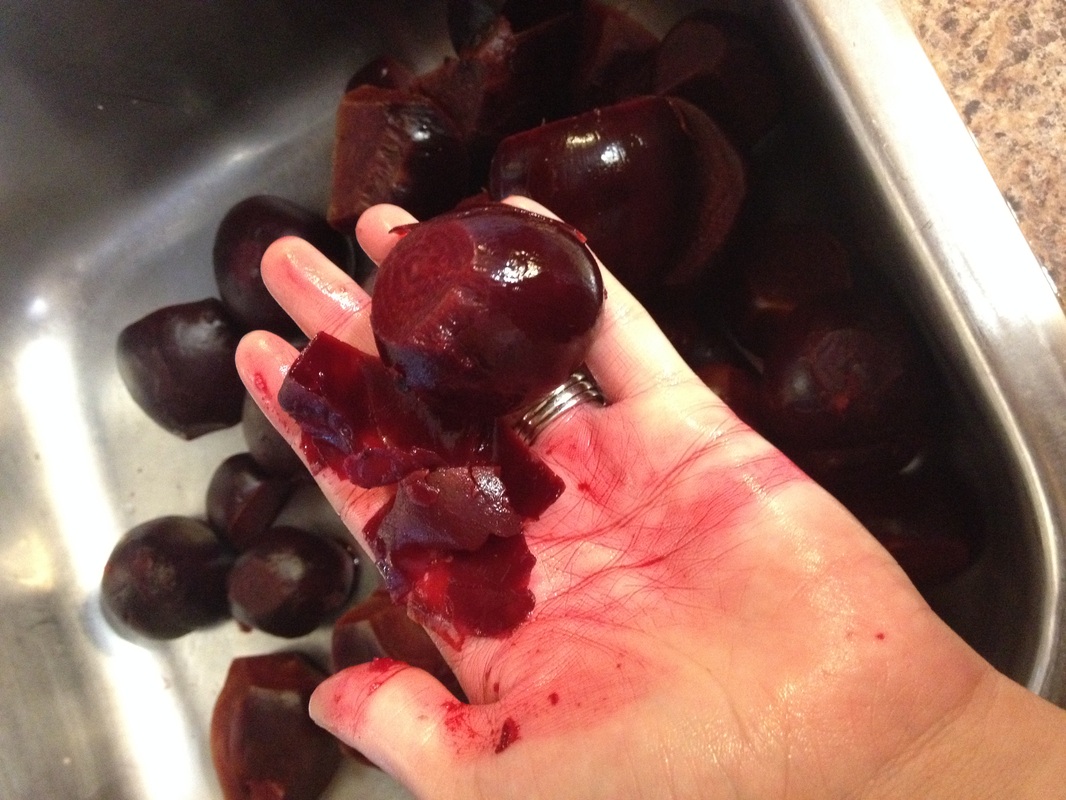
Beets are one of our favorite things to grow in our garden. Try some of the below recipes for preserving these delicious red veggies! Freezing Beets This is this simplest of preservation recipes... 1. After picking your beets, remove the tops, bottom 'tap root' and any scabs. 2. Wash your beets in the sink. A lot of people will argue that you shouldn't cut the beets, saying that keeping the beets whole will prevent them from bleeding and keep more of the nutrients in the veggie. I like to wash and cut my beets first because I use the beet water to make jelly and prefer not to have dirt or scabs on my toast! But do as you wish. 3. Boil the beets in a large pot until tender. Depending on the size, this may take 30-50 minutes. Put your beet water aside. Don't throw it out! NOTE: Your kitchen will look like somebody butchered a cow- there will be red beet juice EVERYWHERE! To minimize the splatter, boiling over & months of smoking oven elements, try this SUPER HANDY Epicure 'Silicone Spill No More'. It prevents your pots from boiling over and the $25.00 it costs is SO WORTH IT! Not just for beets, but for anything and everything you boil! You can check it out online at: http://www.meganblack.myepicure.com/en-ca/shop.aspx 4. Cool the beets by removing them one by one from the beet water and placing them in ice cold water. As soon as you can handle the temperature of the beets, begin peeling them. 5. By placing them in the ice water, you should be able to essentially 'squeeze' the entire peel off of each beet, as per the pictures below. If you wait too long, peeling will become more difficult. 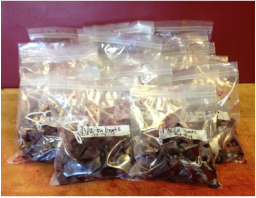 6. After peeling the beets, allow them to cool further. You can then cut to your desired shape & size. In the past I have used a food processor as I had large quantities of beets. This does work but it will make your pieces rather small. If you want bigger pieces, get out our knife and start chopping! 7. I like to portion about 1.5-2 cups of beets per ziploc bag. This is enough for my family of two. Choose whichever you like & will use. 8. Either vacuum seal (if you are lucky enough to have one!) or use a straw to suck out any extra air in the bags. This will help your frozen beets last longer. Don't forget to label the bags with the date. 9. Throw them in the freezer and enjoy home-grown veggies all winter long! Beet Puree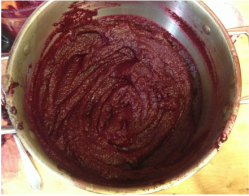 Pureeing beets was a new adventure for me this year. After seeing multiple recipes on Pinterest about adding beet puree, I decided I would try it. 1. I followed steps 1 through 6 above, washing, boiling and peeling the root vegetables. 2. I then simply chopped them up small enough to fit in my favorite kitchen item- the food processor. Because the beets are relatively dry, I did end up adding a few cups of beet water to the mixture. The photo to the left is what my beet puree looked like. Beet Jelly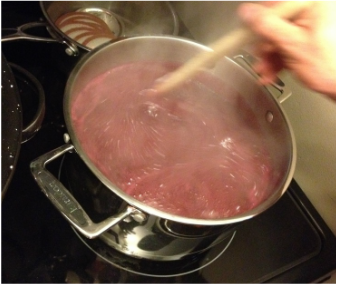 After boiling so many beets and seeing the vibrant red water left in the pot, I just couldn't throw it away! I went to Facebook and asked my friends if they had any great recipes for beet cooking water. My Aunt sent me this DELICIOUS beet jelly recipe...
Bring to a boil: 4 cups of beet water 1.5 packages of Certo 4 Tablespoons of lemon juice Add: 1 package of grape Jell-o 4 cups of sugar Boil for 6 minutes. Pour into clean jars & seal. This recipe was way too easy! And the jelly actually tastes GREAT! I must admit I was very reluctant to put beets on my morning toast but the sugar and jell-o help to keep the jelly sweet. And the color is just vibrant! ENJOY! Branding season is one of my absolute favorite times of year. In our part of the country, it seems to be a travelling circus of good food, great people and a whole lot of work accomplished, starting in April and lasting until July. We calve our cows earlier than most commercial cow/calf producers in our area and are usually one of the very first brandings after our purebred neighbours. Last weekend marked our branding and we had an amazing crew of handy cowboys/girls to make light work of the day. Thanks to everyone that helped out!  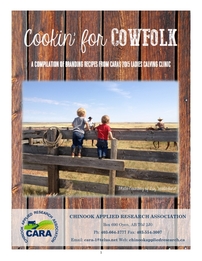 Every branding seems to have their signature dish, be it Bacon & Beans at the Baron's, Taco Salad at the Vredegoor's or Super Potatoes at the Griffith's, that everyone secretly comes to the branding for. As a part of a local producer research group called CARA, I spear-headed an effort to gather some of these favorites from our community at a Ladies Calving Clinic this past winter. It's a fun collection & there is a little bit of everything in there. Download & enjoy... Cookin' For Cowfolk: A Compilation of Branding Recipes from the 2015 CARA Ladies Calving Clinic My Pumpkin Pie Tarts were a big hit at our branding, with Uncle Bruce calling them the 'Cocaine Tarts'. They were snatched up in a hurry and were way too easy to make. They follow my pumpkin pie recipe I've posted in the past, but was divided into mini-tarts. This way there is no cutting & serving required and the help can grab a tart and go! I cooked the tarts for 24 minutes at 350F. One recipe did about 25 tarts which meant my preserved pumpkin puree went a long way and there is still lots in the freezer to last until this fall's harvest! I wrote this DIY article for the Rural Housewives website. This board is a staple in our household during calving season and is essential to our farm organization. Check out how we use it here!  Check out the feature Return to Rural did about our 'farm story'... 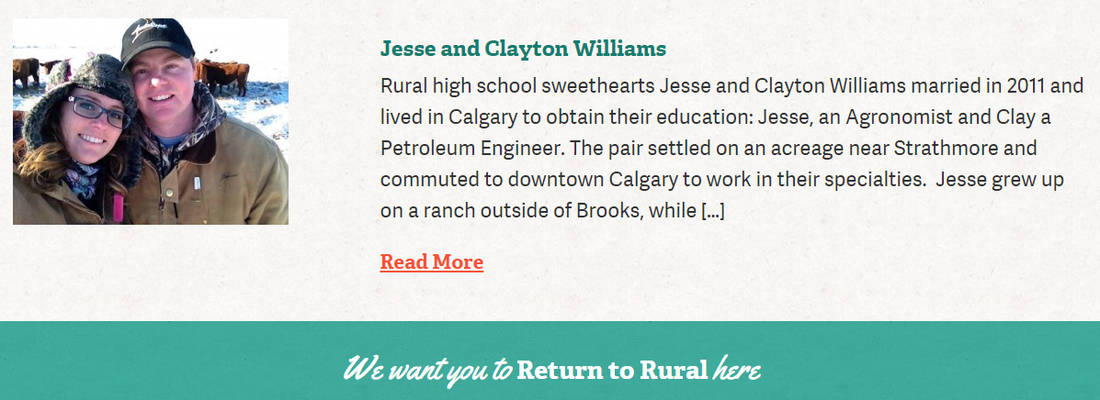 |
A Blog About Our Life, Love & Lessons Learned on the Ranch
Categories
All
in the mediaArchives
February 2024
|